

Key Takeaways
- Inspect gutters twice yearly and after major storms to catch clogs, loose hangers, and early corrosion before damage spreads.
- Remove debris and flush gutters and downspouts until water discharges freely away from the foundation, clearing stubborn blocks with a snake.
- Verify proper gutter pitch (about 1/4 inch per 10 feet) to prevent standing water, overflow, fascia rot, and basement leaks.
- Seal leaking seams, end caps, and pinholes promptly, and replace sagging or rusted sections before they fail and cause structural damage.
- Use appropriate gutter guards and trim overhanging branches to reduce clogging and ice buildup, minimizing overflow and maintenance frequency.
Gutter Maintenance Basics: How Often to Check

Although gutters seem like a “set-and-forget” feature, you should inspect them on a regular schedule to prevent clogs, leaks, and fascia damage. Check them at least twice per year: once after spring pollen and seed drop, and again after autumn leaves fall.
Add an extra check after major windstorms or heavy downpours, when debris and shingle grit accumulate quickly. Your Gutter material influences timing: steel and copper tolerate abrasion, while vinyl and thin aluminum deform sooner and need closer monitoring.
Your Gutter design also matters; tight elbows, narrow downspouts, and complex rooflines trap debris and require more frequent reviews. During each check, confirm steady runoff, clear outlets, intact sealant, and secure hangers. Document findings for consistency.
Gutter Maintenance Safety: Ladders and PPE
Before you climb, set up for safety with the right ladder practices and PPE, because gutter work combines height, wet surfaces, and sharp debris.
Choose a Type I or IA extension ladder that extends at least 3 feet above the roof edge, and set it at a 4:1 angle on firm, level ground. Lock spreaders, engage rung locks, and maintain three points of contact.
Follow Ladder safety tips: keep your belt buckle between the rails, never overreach, and reposition often.
Use Personal protective equipment that matches the hazards: cut-resistant gloves, safety glasses, long sleeves, and non-slip footwear.
If you’re near power lines, keep proper clearance and avoid metal ladders.
Don’t work alone; have a spotter stabilize the base.
How to Clean Gutters and Downspouts
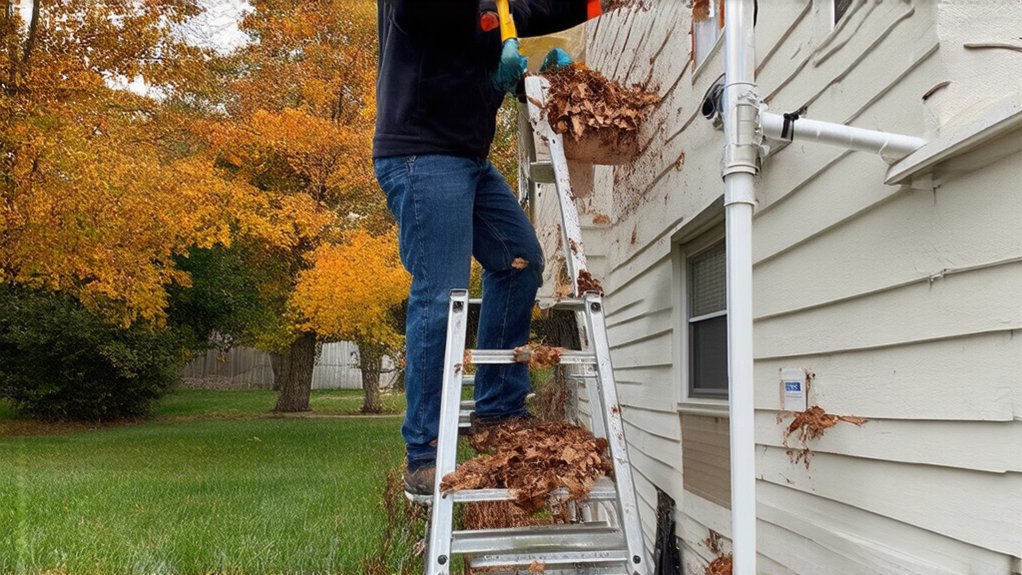
Once you’re secured on the ladder and wearing proper PPE, you can clean gutters efficiently with safe tools such as a gutter scoop, a stiff brush, a bucket, and a garden hose with a spray nozzle.
You’ll remove debris in sections, bag it immediately, and rinse the channel toward each downspout to confirm steady flow.
You’ll then flush each downspout from the top with controlled water pressure, check the discharge at ground level, and clear any blockage with a plumber’s snake if flow remains restricted.
Safe Cleaning Tools
When you clean gutters and downspouts, the right tools keep the work efficient while reducing slip, cut, and fall risks. Start with a stable extension ladder, set on level ground, and use a standoff to avoid crushing the gutter edge. Wear cut-resistant gloves and safety glasses to guard against sharp debris and hidden fasteners.
Choose a narrow gutter scoop or trowel to lift compacted material without forcing your hands into tight corners. For eco-friendly cleaning, keep a bucket and reusable cloths to contain waste and reduce runoff.
If you notice loose hangers or separated seams, keep basic hand tools ready for DIY gutter repair.
- Ladder stabilizer (standoff)
- Cut-resistant gloves and goggles
- Gutter scoop and debris bucket
- Handheld brush for stubborn buildup
Downspout Flushing Steps
Although gutters can look clear from the top, a partially clogged downspout can still trap water and force overflow, so you should flush each run methodically to confirm full drainage.
Start with debris removal at the outlet: clear the elbow and splash block, then check the bottom for compacted leaves. Insert a hose at the top drop, seal the opening with a rag, and run water at moderate pressure for 30–60 seconds.
Watch for a steady, uninterrupted discharge; pulsing flow signals a blockage. If water backs up, disconnect the lower elbow and probe upward with a plumber’s snake, then flush again.
Complete Downspout flushing by reattaching joints, tightening straps, and confirming water exits away from the foundation grade.
Seasonal Gutter Maintenance Checklist (Spring–Winter)
As the seasons shift, your gutters face different stresses—from spring pollen and seed pods to winter ice and heavy runoff—so a seasonal checklist keeps water moving where it should. Match tasks to your gutter design and gutter materials, and you’ll reduce clogs, overflow, and premature wear.
- Spring: Scoop debris, rinse channels, and clear roof-valley drop zones after blooms and storms.
- Summer: Trim overhanging limbs, remove shingle grit, and re-check fasteners after heat cycles.
- Fall: Clean twice if trees shed heavily, and install or clear guards before peak leaf drop.
- Winter: Keep channels open, confirm outlets discharge away from the foundation, and remove heavy snow buildup near eaves.
Schedule work after major weather events, and document dates to stay consistent.
Spot Gutter Problems Early (Sagging, Rust, Stains)
How can you tell your gutters need attention before they fail? Start with alignment. If you see a visible dip, sections pulling away from the fascia, or fasteners that sit proud, you’re likely dealing with sagging from excess debris weight or weakened hangers. Check downspout connections for strain and look for overflow marks beneath low spots after rain.
Next, inspect the metal and finish. Gutter discoloration often signals persistent moisture, trapped sediment, or chemical runoff from roofing. Note any orange streaking, flaking paint, or rust spots near joints, end caps, and bracket points.
Finally, scan the siding and soffits for brown stains, peeling paint, or softened wood—early evidence your drainage path isn’t performing.
Fix Gutter Leaks, Seams, and Small Holes
You’ll prevent costly water damage by locating leaks at seams, end caps, and fastener points before they widen. Run water through the gutter, watch for drips underneath, and mark each suspect joint so you can reseal it promptly.
Patch small holes immediately with gutter sealant and a compatible patch, then recheck flow to confirm you’ve restored a watertight line.
Find Leaks And Seams
After heavy rain, inspect your gutters for leaks at seams, end caps, corners, and around fasteners, since these joints often fail before the gutter run does. Work methodically from the downspout up, and note any drip lines on fascia or siding that indicate hidden pathways.
For reliable leak detection, run a hose lightly while you watch each joint; mark suspect spots with painter’s tape for later attention. Before any sealant application, confirm the joint is the true source by checking for overflow, loose hangers, or separated sections.
Prioritize these checks:
- Look for staining, rust halos, or mineral trails beneath joints
- Check seam overlaps for gaps or lifted edges
- Inspect end caps for movement when tapped
- Verify fasteners aren’t backing out or deforming metal
Patch Small Holes Fast
A small hole in a gutter can turn a controlled channel into a constant drip, so patch it as soon as you confirm it isn’t caused by a loose joint or overflow. Clean the area to bare metal or sound coating, then dry it fully; moisture undermines adhesion and accelerates corrosion.
For Gutter patching, roughen lightly with sandpaper, wipe with mineral spirits, and apply a waterproof gutter sealant rated for your gutter material. Press a mesh patch into the sealant for larger pinholes, then overcoat to encapsulate edges.
This hole sealing method resists expansion, contraction, and standing water. Inspect nearby seams and fasteners, because small holes often accompany stress points.
After curing, run water to verify a tight, drip-free repair. Recheck after the next storm cycle too.
Stop Gutter Overflow: Slope, Clogs, Extensions
- Check pitch: guarantee the run drops about 1/4 inch every 10 feet toward the downspout.
- Clear blockages: remove leaves, shingle grit, and roof granules from troughs and outlets.
- Flush and verify flow: hose from the high end and watch for standing water or slow drains.
- Add extensions: direct discharge at least 4–6 feet away, and secure joints to stop leaks.
Finish by rechecking during light rain so you can spot splash-over early.
When to Install Guards or Call a Gutter Pro
Once you’ve confirmed the gutters pitch correctly, drain freely, and discharge well away from the foundation, look at how often debris returns and whether access is safe for routine cleaning. If you’re cleaning more than twice a season, consider guards; key Gutter guard benefits include reduced clogging, fewer ladder trips, and steadier flow during storms.
Choose products matched to your roof type and debris (mesh for pine needles, screens for leaves), and verify they don’t void roofing warranties. Call a gutter pro if you see recurring leaks at seams, sagging runs, loose fascia, or rust-through; these indicate fastening or structural issues beyond routine maintenance.
Ask about gutter replacement options, including seamless aluminum, larger downspouts, or upgraded hangers for heavy snow loads.
Frequently Asked Questions
How Much Does Professional Gutter Cleaning Typically Cost per Visit?
You’ll typically pay $100–$250 per visit for professional gutter cleaning, depending on home size, height, and debris. For cost comparison, request itemized quotes including downspout flushing, disposal, and minor repairs, if needed.
Do I Need Permits to Replace or Reroute Gutters and Downspouts?
You might need permits; it depends on local Permit requirements. Coincidentally, you’ll ask right before Gutter rerouting affects drainage. You should check your city or HOA, especially for altering discharge, fascia, or underground connections.
Which Gutter Materials Last Longest in Coastal or High-Humidity Climates?
You’ll get the longest life in coastal or high-humidity climates with marine-grade aluminum or copper; they optimize Gutter material durability and Coastal climate resistance. You should avoid untreated steel, and you’ll extend lifespan with stainless fasteners.
Can Clogged Gutters Worsen Indoor Humidity, Mold, or Foundation Dampness?
Yes, clogged gutters can worsen indoor humidity, mold growth, and foundation dampness. You’ll trap water against siding, drive Indoor moisture indoors, and saturate soil at footings, forcing dampness through cracks and crawlspaces. Clean them.
How Do I Prevent Ice Dams Without Damaging Shingles or Gutters?
You’ll achieve Ice dam prevention and shingle protection by improving attic insulation and air sealing, adding roof-edge heat cables, clearing snow with a roof rake, and keeping gutters flowing; don’t chip ice or use salt.
Conclusion
If you keep up with gutter checks and cleanouts, you’ll prevent leaks, rot, and foundation washouts. Stick to a seasonal routine, watch for sagging or staining, and seal small seams before they widen. For example, one homeowner noticed paint bubbles under a corner joint, resealed it, and cleared a buried downspout elbow; that simple fix avoided a basement seepage repair that would’ve cost thousands. If overflow persists, install guards or call a pro.