
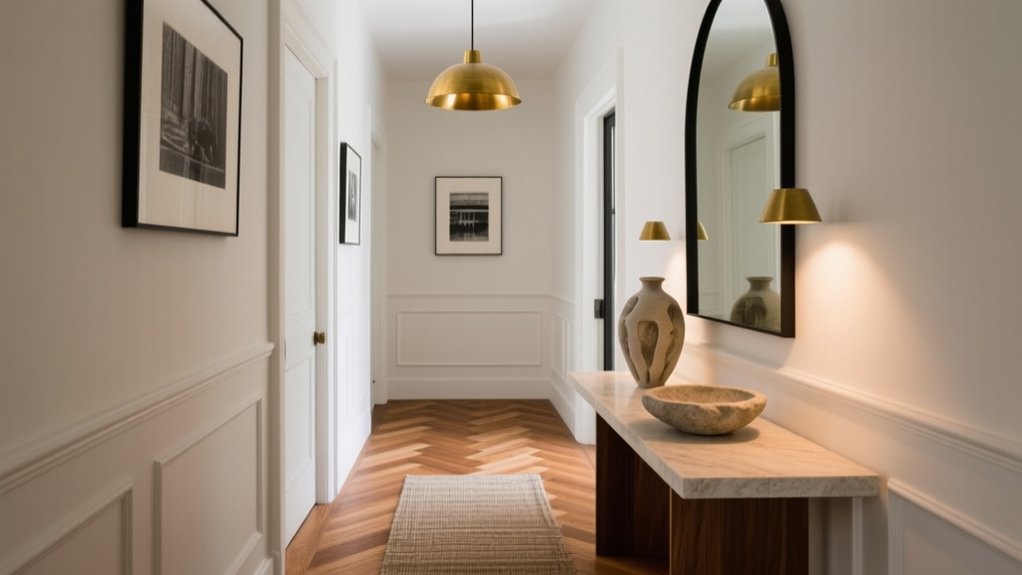

You make a strong first impression by fixing your hallway’s big three: lighting, flow, and clutter. Swap in a semi-flush LED (2700–3000K), add eye-level sconces on a dimmer, and use a large mirror to bounce light and depth. Keep circulation clear with slim consoles, consistent-height hooks, and closed shoe storage plus one catchall tray. Echo adjacent-room colors and limit finishes to 2–3 materials, then ground it with a durable runner—next up, the exact layout moves that polish it.
Key Takeaways
- Brighten the hallway with layered lighting—semi-flush ceiling LEDs plus eye-level sconces on dimmers—to eliminate shadows and feel welcoming.
- Keep the path clear using slim consoles, consistent hook heights, and closed storage so the entry looks spacious, not cluttered.
- Create visual flow by echoing nearby room colors and repeating two or three core materials like oak, brass, or black metal.
- Use mirrors to amplify light and depth, ideally opposite windows or sconces, and choose warm, low-contrast paint to soften angles.
- Hang fewer, bolder artworks at 57–60 inches with consistent spacing, and anchor the entry with a durable runner and grippy pad.
Start With Your Hallway’s Biggest Problem (Dark, Narrow, Cluttered)

Before you pick paint colors or swap light fixtures, pinpoint what’s actually working against your hallway—because most entryways struggle with one of three issues: darkness, tight proportions, or everyday clutter. Start by diagnosing: if it feels dim at noon, prioritize Lighting improvements like a semi-flush LED fixture, higher-lumen bulbs (2700–3000K), and a wall sconce to eliminate shadows. If it reads narrow, keep circulation clear: mount hooks and shelves at consistent heights, choose slimline consoles, and hang a large mirror to bounce light and widen sightlines. If clutter’s the culprit, commit to clutter management: add a closed shoe cabinet, labeled drop zone trays, and a single catchall rule. Solve the biggest constraint first, then refine.
Choose a Hallway Style That Matches Nearby Rooms
To make your hallway feel intentional, you’ll want its style to track with the rooms it connects. Echo adjacent color palettes—pull the same warm whites, muted greens, or inky blues onto trim, a runner, or artwork so the progression reads seamless. Repeat key materials nearby, too, like matching oak tones, blackened metal finishes, or stone accents, so the corridor feels like a continuation rather than a break.
Echo Adjacent Color Palettes
Although a hallway often reads as a pass-through, it works best when it echoes the color palettes of the rooms it connects, creating a deliberate visual rhythm instead of a hard stop. Start by sampling two or three dominant hues from nearby spaces, then carry them through with paint, trim, and subtle accents so progressions feel intentional.
Use adjacent color palettes to keep the flow modern: think warm white into greige, sage into muted olive, or inky blue into blue-gray. Reserve high-contrast shifts for doorways, not long runs, so the corridor doesn’t feel chopped up. Aim for harmonious color schemes by matching undertones—warm with warm, cool with cool—and repeating one anchoring neutral throughout. If rooms vary, choose a “bridge” shade that flatters both sides.
Repeat Key Materials Nearby
Color sets the rhythm, but materials lock the hallway into the same design story as the rooms it serves. If your living room leans oak, brass, and linen, pull those finishes into the hall: an oak console, brass picture lights, and a linen runner. This material consistency makes connection feel intentional, not accidental.
Use texture repetition to bridge styles without copying everything. Repeat a fluted wood detail from nearby cabinetry as wall paneling, or mirror a matte plaster fireplace finish with a limewash hallway. If adjoining rooms feature blackened steel, choose matching door hardware and a slim-framed mirror. Keep sheen levels aligned—glossy next to matte reads disjointed. Limit yourself to two or three core materials, then vary scale and placement for a current, layered look.
Layer Hallway Lighting: Ceiling, Sconces, and Bulbs
You’ll get a polished hallway by layering ambient ceiling light with accent sconces that visually widen the passage and highlight art or textures. Keep the ceiling fixture practical for overall illumination, then place sconces at consistent heights to eliminate shadows and add architectural rhythm. Choose warm bulbs—around 2700K to 3000K with high CRI—for an inviting, true-to-color glow that feels current.
Combine Ambient And Accent
When you layer hallway lighting, the space feels intentional instead of flat, because each fixture type handles a different job. Start with a clean ceiling source for ambient lighting that evenly fills the corridor and prevents harsh shadows. Then add wall sconces at eye level to guide movement, define rhythm, and make the walls feel closer and warmer without narrowing the path. Finish with focused points—picture lights, small directional spots, or uplights—to highlight art, a console vignette, or textured paneling as accent decor. Keep fixture finishes coordinated so the mix reads curated, not chaotic. Put sconces and accents on separate dimmers or smart controls, so you can shift from bright, practical arrival mode to a softer, gallery-like glow instantly.
Choose Bulbs For Warmth
Although fixture placement sets the framework, the bulbs ultimately decide whether your hallway reads inviting or sterile. Start by dialing in lighting temperature: 2700K to 3000K gives a warm, residential glow that flatters skin tones and wood finishes, while 3500K+ can feel clinical in tight corridors. Choose bulb color intentionally—soft white for cozy traditional spaces, warm white for modern interiors that still need comfort.
Match bulb output to your layers. Use higher lumens in ceiling fixtures for safe circulation, then slightly softer bulbs in sconces to reduce shadows at eye level. Opt for high-CRI LEDs (90+) so paint, art, and runners look true. If possible, add dimmable bulbs to shift mood from daytime crispness to evening warmth.
Use Light Paint Colors to Make Hallways Feel Wider
Because most hallways lack generous width and natural light, paint color does the heavy lifting in how open the space feels. Choose light, low-contrast shades that bounce illumination and soften hard angles—think warm whites, pale greiges, and airy taupes. Color psychology matters: warmer off-whites feel welcoming, while cool near-whites read crisp and contemporary, especially in modern homes. Keep ceilings a half-step lighter than walls to visually lift height, and extend the same hue onto trim to reduce visual breaks. Dial in the paint finish to control glare and durability: eggshell on walls, satin on trim, flat on ceilings. For a designer-approved formula, follow this:
- Match undertones to your bulb temperature.
- Limit accent colors near doorways.
- Test large swatches under day/night light.
Add a Hallway Mirror to Reflect Light and Depth
Light paint opens a hallway up, but a well-placed mirror multiplies that brightness and adds instant depth. Position it opposite a window or sconce so Light reflection bounces down the corridor, reducing shadows and making the space feel longer.
Choose scale deliberately: a tall mirror elongates low ceilings, while a wide mirror visually expands narrow walls. Hang it at eye level, centered to your main sightline from the entry, and keep it a few inches above a console if you have one. A Decorative frame matters—thin black metal feels modern, warm oak reads organic, and antiqued brass signals quiet luxury. For a sharper look, match the frame finish to nearby hardware and lighting for cohesion. Avoid placing it where door swings can hit it.
Create a Hallway Art Wall That Fits the Scale
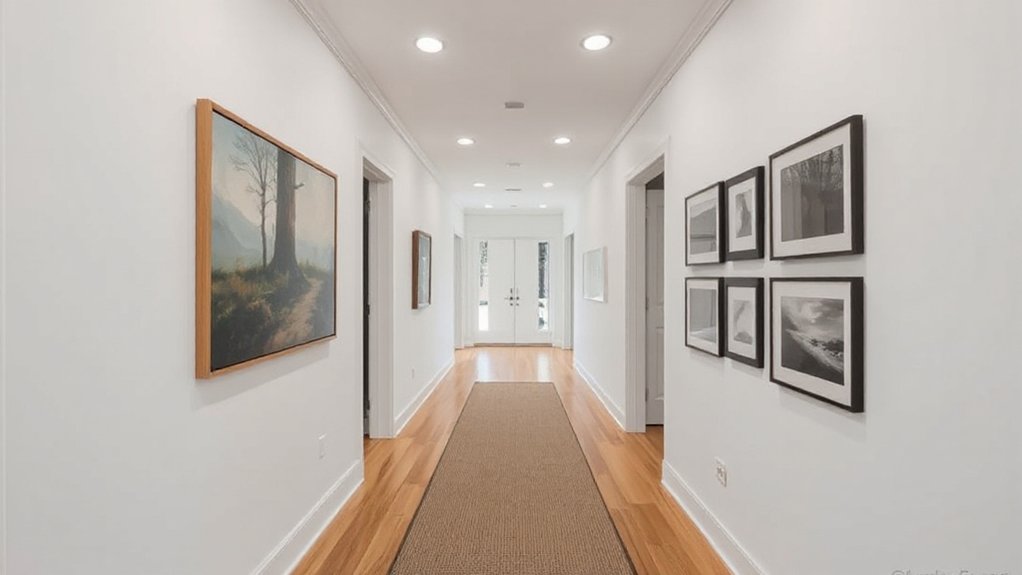
Start by measuring your hallway wall and the frames you want to hang, so the art reads intentional instead of undersized or crowded. You’ll balance artwork with breathing room by matching the overall gallery width to the wall’s scale and keeping negative space consistent. Then plan your layout and spacing in advance—map it on the floor or with paper templates—so every piece lands in a clean, on-trend grid or a tightly controlled salon-style cluster.
Measure Wall And Frames
Two quick measurements keep a hallway art wall from looking undersized or overpowering: the wall’s usable width/height and each frame’s outer dimensions (including mats and spacing). Start by confirming Wall measurements between trim, switches, and door casings so you’re working with the true canvas, not the full drywall span. Then lock in Frame sizing by measuring the outside edge-to-edge of each piece, adding your planned gap (trend-forward galleries often use 2–3 inches). Before you hang, map it precisely:
- Measure usable width/height and note obstacles.
- Record each frame’s outer size; include mat and moulding.
- Mock the layout on the floor or with painter’s tape, then verify total run.
You’ll avoid costly rehangs and keep sightlines crisp.
Balance Artwork With Space
Because hallways are narrow by nature, you need your artwork to read at a glance without crowding the walkway or floating awkwardly on an oversized wall. Anchor the composition to the architecture you already have: align frames with door casing heights, stair angles, or a console’s footprint so the wall feels intentional, not random. For strong space utilization, let negative space work like a border—your art should feel framed by the wall, not swallowed by it. Choose fewer, bolder pieces when the corridor is tight, and reserve multi-piece collections for longer runs where the eye can travel. Prioritize artwork placement where sightlines naturally land: the entry approach, the turn, and any pause point near doors. Keep the look current with cohesive finishes and simplified palettes.
Plan Layout And Spacing
When you plan the layout first, your hallway art wall reads as a scaled composition rather than a scatter of frames. Start by measuring wall width, door swings, and sightlines from the entry so the grouping lands where you naturally pause.
Use these spacing rules to keep it intentional:
- Anchor the set to your furniture arrangement—center the art over a console or bench, not the drywall.
- Keep consistent gaps (2–3 inches) between frames; vary sizes, not spacing, for a current gallery look.
- Set height for viewing: aim for 57–60 inches to the centerline, then adjust for tall wainscoting.
If the corridor echoes, integrate acoustic treatment with soft-backed frames or a textile panel so the wall performs, too.
Style an Entryway Console With 3 Simple Pieces
Although your entryway console sits in a high-traffic spot, you can make it look intentional (not cluttered) with just three pieces: a tall anchor, a functional catchall, and one curated accent. Start with a vertical element—a mirror, framed art, or slim lamp—to pull the eye up and balance the console’s length. Keep it centered or slightly offset, but align edges for a tailored look.
Next, add a low-profile tray or lidded bowl for keys, mail, and earbuds; this is entryway organization that still reads refined. Choose stone, brass, or matte ceramic to match your hardware. Finish with one statement item: a sculptural vase, small stack of design books, or a single branch. That’s how decorative accents feel edited, modern, and calm.
Add Slim Hallway Storage: Hooks, Shelves, Closed Bins
A styled console sets the tone, but slim storage keeps your hallway working day to day without sacrificing the clean look. Choose wall-mounted pieces with tight projections (4–8 inches) so circulation stays clear and the space reads intentional, not cluttered. Build a vertical drop zone that matches your finishes—black metal, warm brass, or light oak—for a modern, cohesive feel.
- Install decorative hooks at two heights: adult level for coats and bags, lower for kids’ backpacks.
- Add a narrow picture ledge or floating shelf above for mail trays, keys, and a small catchall.
- Use closed bins in a shallow cabinet or lidded baskets to hide shoes, pet gear, and seasonal extras.
Keep labels minimal, and edit weekly so Slim storage stays effective.
Upgrade Your Hallway Runner for Color and Durability

Since a hallway takes the brunt of muddy shoes and constant foot traffic, upgrading your runner delivers instant color while protecting the floor. Prioritize Material selection: choose low-pile wool blends for resilience, indoor/outdoor polypropylene for easy cleaning, or flatweave cotton for a lighter, layered look. Lock it down with a grippy pad so edges don’t curl and trips don’t happen. For Color coordination, pull one hue from nearby artwork or cabinetry and repeat it in the runner’s pattern; this keeps the entry feeling intentional, not noisy. Scale matters too: a bolder motif suits long, narrow corridors, while subtle stripes visually lengthen tight spaces. Finish with stain-resistant treatment and a bound edge for longevity. Rotate seasonally to even wear.
Add Wall Paneling and Matching Hardware for a Finished Look
When you want your hallway to look custom rather than cobbled together, wall paneling gives it instant architecture and the right hardware makes the finish feel intentional. Choose profiles that suit your home: slim Shaker boxes for modern, beadboard for cottage, or board-and-batten for height. Paint it one color for a tailored, on-trend “envelope” look, or contrast with the upper wall to define sightlines.
Lock in cohesion with matching hardware across every touchpoint:
- Use one metal finish for hooks, door levers, and a console pull.
- Repeat the same shape language—arched, square, or knurled.
- Align heights: keep hooks and plates level for clean rhythm.
Seal edges crisply, and your entry reads designed, not decorated.
Frequently Asked Questions
How Wide Should a Hallway Be to Meet Building Codes?
You’ll typically need a hallway at least 36 inches wide; many codes require 44 inches in commercial routes. Confirm local amendments. Then refine lighting ideas and color schemes to improve perceived width and compliance.
What Flooring Is Best for High-Traffic Hallways With Pets?
Choose luxury vinyl plank or porcelain tile for high-traffic hallways with pets; they’re a suit of armor. You’ll get durable materials, pet friendly flooring, waterproof cores, scratch resistance, and easy cleaning; add textured finishes, sealed grout.
How Can I Soundproof a Hallway to Reduce Echo and Noise?
You can soundproof a hallway by adding Acoustic panels on walls/ceiling, hanging Soundproof curtains at openings, laying a thick runner with underlay, sealing door gaps, and using soft furnishings to break reflections.
What’s the Best Way to Hide HVAC Vents or Return Grilles?
Use decorative vent covers that match trim or wall color, or install slatted wood panels as concealment techniques while preserving airflow. You’ll maintain access with magnetic or hinged fronts, and you won’t compromise HVAC performance or codes.
How Much Does a Typical Hallway Remodel Cost per Square Foot?
You’ll typically pay $50–$150 per square foot for a hallway remodel; measure twice, cut once. You’ll spend more if you upgrade lighting fixtures, refine color schemes, and replace flooring, trim, or drywall.
Conclusion
When you fix your hallway’s biggest pain point, you instantly set a polished tone for the entire home. Match the style to nearby rooms, then layer lighting—ceiling fixture, sconces, and warm bulbs—to banish shadows. Keep paint light, add a mirror to double depth, and style a console with three curated pieces. Build in slim storage, upgrade your runner, and finish with paneling and coordinated hardware—it’ll look a mile wide.