


It’s no coincidence that the most compelling gardens often use the fewest elements, arranged with precision. When you strip your space back to clean lines, controlled color palettes, and clear focal points, you amplify structure and impact. By manipulating contrast, repetition, and vertical layering, you can transform even a modest plot into a highly legible, visually dynamic environment. The real difference comes from a handful of strategic moves you’re probably not using yet…
Key Takeaways
- Define clear paths, seating, and planting zones first so even a small garden feels organized, spacious, and intentional.
- Use one strong focal point per view—like a bold pot, sculpture, or specimen tree—to anchor the space and avoid visual clutter.
- Repeat a limited palette of plant colors, shapes, and container materials to create cohesion and make the design look polished.
- Add vertical elements—trellises, climbers, and tiered pots—to gain lush impact without needing extra ground space.
- Upgrade paths and add simple warm LED lighting to sharpen structure, guide movement, and highlight key plants at night.
Start With a Simple Garden Design Plan
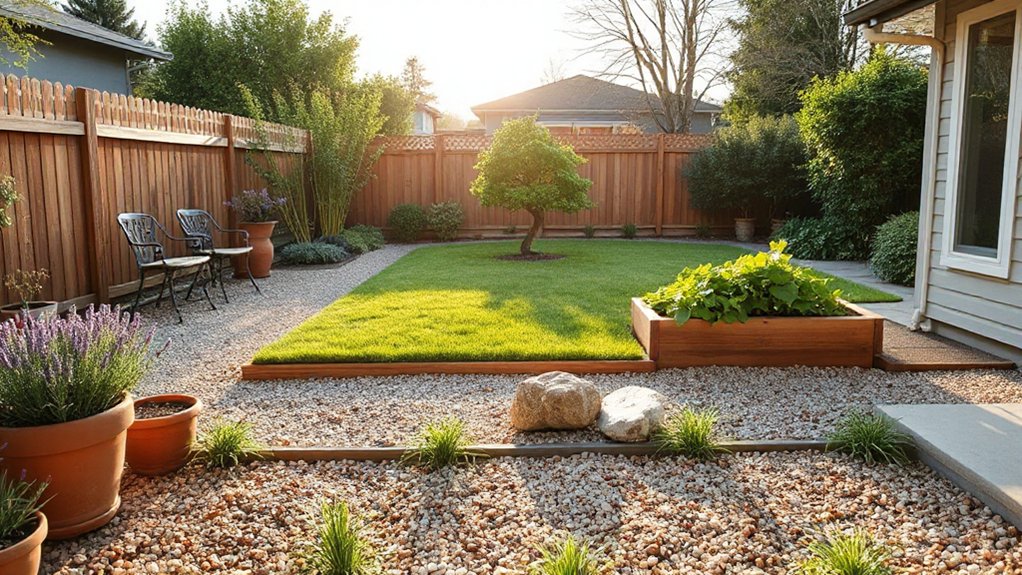
Before you put a single plant in the ground, define a clear, scaled garden design plan that maps out boundaries, circulation paths, focal points, and planting zones. Begin by measuring your site and sketching a base map to scale so your garden layout reflects actual dimensions, not guesses.
Next, organize space into functional zones: entry, seating, production, and service areas. Align paths with natural desire lines so movement feels intuitive, not forced. Locate focal points—sculpture, specimen trees, or water features—on key sightlines from doors and main seating areas.
Finally, assign planting zones according to sun exposure, soil moisture, and maintenance level. This prevents overcrowding, simplifies irrigation design, and guarantees every planting bed has a clear purpose and performance expectation.
Use Color to Create Big-Impact Garden Moments
You’ll use color as a strategic design tool, not an afterthought, to engineer bold focal points that arrest the eye and organize the space.
By controlling harmonious garden color schemes—through analogous, complementary, or monochromatic plant palettes—you’ll create visual coherence from bed to bed.
Then you’ll plan seasonal color shifts so that blooms, foliage, and bark provide successive “high-impact” moments from early spring through late fall.
Bold Color Focal Points
A well-placed burst of saturated color functions as a visual anchor, directing the eye and organizing the garden’s composition. You create a focal point by concentrating pigment intensity in a single feature: a cobalt container, vermilion trellis, or chartreuse accent wall. Position it where paths intersect, sightlines converge, or views terminate.
Integrate bold color with garden furniture—paint a bench crimson or chairs teal to contrast surrounding foliage. This chromatic emphasis clarifies spatial hierarchy and makes small spaces feel intentional.
Surround vivid elements with restrained planting palettes to prevent visual noise. Choose durable, UV-stable finishes and weather-resistant textiles.
In planting beds, deploy high-chroma flowers in compact drifts, then buffer them with dense, aromatic foliage that can help confuse and deter some garden pests.
Harmonious Garden Color Schemes
Bold accents work best when they sit inside a coherent palette, so now you’ll structure color across the entire garden for sustained impact rather than single hits of drama. Think in terms of visual rhythm, not isolated moments. Use a limited spectrum, then repeat it deliberately in planting, hardscape, and accessories.
- Define a base hue (often green), then select two dominant colors and one accent to maintain chromatic discipline.
- Echo those hues in flower arrangements placed near borders, pathways, and entry points to visually “stitch” spaces together.
- Coordinate garden furniture finishes—powder-coated metal, stained wood, or textiles—to match or subtly contrast your plant palette.
- Group plants by tone (cool vs. warm) in distinct zones to prevent muddiness and create clear, legible color fields.
Seasonal Color Transitions
Why let your garden’s color story peak for only a few weeks when you can choreograph successive “high seasons” from early spring through late autumn? You do this by mapping a seasonal palette and rigorously planning bloom timing. Layer early bulbs, ephemerals, and flowering shrubs, then follow with perennials, annuals, and late-season grasses.
Create overlapping waves: as one color cohort declines, another reaches its crescendo. Use spreadsheets or planting diagrams to track flowering windows, foliage color shifts, and fruiting displays.
Prioritize multi-season performers—shrubs with spring bloom, summer structure, and fall color.
Repeat anchor colors across seasons—cool blues, fiery oranges, or clear whites—while allowing supporting hues to shift. This continuity makes progressions feel intentional, not accidental.
Play With Height and Layers in Small Spaces
- Select narrow, columnar trees or bamboos to establish a vertical framework without casting dense shade.
- Use container stacking—tiered stands, wall racks, and railing boxes—to multiply planting surfaces on balconies or tiny patios.
- Install trellises or cable systems for climbers, freeing ground area while adding textured greenery.
- Stage movable pots at varied heights using benches and plinths to fine-tune sightlines and microclimates.
Add Strong Focal Points for Instant Wow Factor
When you introduce a deliberate focal point, you give the garden a visual anchor that organizes every other element around it. You direct views, control how the eye moves, and prevent the space from feeling scattered.
Begin by selecting one dominant feature per major sightline: a specimen tree, bold container, or sculptural garden art.
Position your focal point at a natural pause—end of a bed, intersection of two views, or framed by shrubs.
Use contrast in form, color, and scale to make it read clearly from a distance.
Consider ecological function too. A birdbath, clustered native shrubs, or pollinator-friendly planting island doubles as a wildlife habitat, delivering both aesthetic drama and measurable environmental value in a compact, efficient footprint.
Upgrade Paths and Edges for a Polished Look
Even in a small garden, upgrading paths and edges immediately clarifies circulation, defines planting areas, and makes the layout feel intentional. Focus on durable materials, crisp lines, and consistent geometry so every route feels deliberate, not accidental.
- Stabilize surfaces: For pathway upgrades, replace patchy turf with compacted gravel, brick, or stone pavers laid on a proper sub-base to prevent heaving and trip hazards.
- Define boundaries: Use steel, concrete, or brick garden edging to create a sharp boundary between paths and beds, preventing mulch creep and soil slumping.
- Control widths: Standardize path widths—wider for main routes, narrower for secondary spurs—to signal hierarchy and improve flow.
- Refine junctions: Square off corners, tighten curves, and align joints with sightlines for a clean, professional finish.
Choose Pots and Containers That Pull the Garden Together
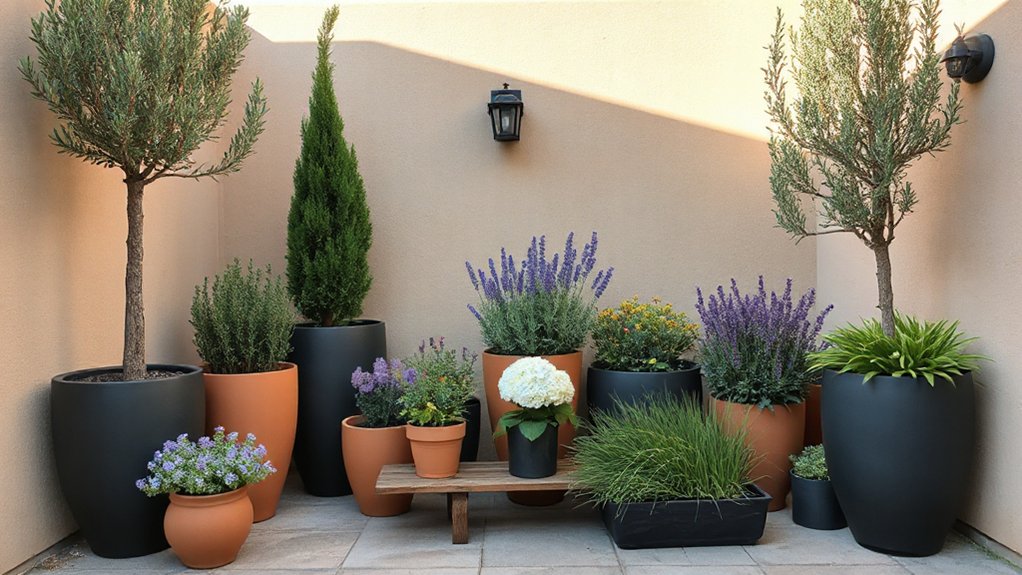
When you choose pots and containers, you’re setting the visual rhythm of your garden, so treat them as a cohesive design system rather than random accents. Focus on coordinating colors and surface textures, balancing sizes and silhouettes, and spacing them so their proportions feel intentional.
Then, mix materials—such as terracotta, glazed ceramic, metal, and lightweight composites—to create contrast and depth without sacrificing unity.
Coordinating Colors And Textures
Although plants provide the primary visual interest in your garden, the colors and textures of your pots and containers quietly determine how cohesive the space feels. You’re fundamentally building a visual “bridge” between planting, hardscape, and garden furniture.
- Select a restrained color palette—two to three dominant hues—then repeat them across containers to create rhythm and reduce visual noise.
- Coordinate pot finishes with adjacent surfaces: matte concrete with stone paving, glazed ceramics with painted timber, corten steel with contemporary metal furniture.
- Use texture contrast deliberately: pair smooth containers with finely textured foliage, and rough, ribbed pots with bold, architectural leaves.
- Echo natural materials used in wildlife habitats—logs, rock piles, small ponds—so containers integrate with ecological features rather than competing visually.
Balancing Sizes And Shapes
Relate container height and width to plant proportions: tall, columnar specimens suit deep, narrow vessels; mounded or cascading plants need broader diameters.
Repeat consistent rim heights or profiles to create rhythm across beds, terraces, and thresholds.
Use simple geometric forms—cylinders, cubes, and low bowls—and repeat them rather than mixing many outlines. This repetition unifies diverse plantings and keeps the eye moving in clean, predictable pathways through the space.
Mixing Materials For Interest
Even in a small space, you can use container materials strategically to visually knit the garden into a coherent whole. Select pots that echo existing surfaces so every element feels intentional rather than random. Repeating materials creates rhythm, while a few contrasting finishes add controlled tension.
- Coordinate with hardscape: Match glazed ceramics to house trim, or use corten-steel planters to pick up tones in paving and edging.
- Link to garden furniture: Pair powder‑coated metal containers with similar chair frames to create a unified seating zone.
- Echo water features: Use stone or concrete pots that mirror the basin or surround of fountains and rills.
- Vary texture, not chaos: Combine matte terracotta, smooth fiberglass, and rough stone in a limited, disciplined palette.
Use Lighting and Accessories to Finish Your Garden Design
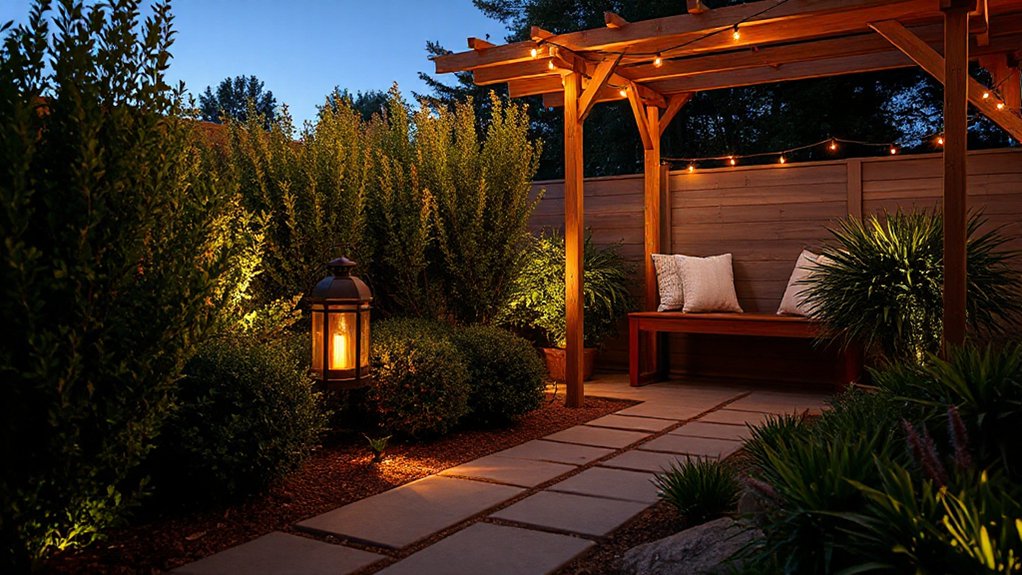
Two strategic tools will refine your garden from a planted space into a coherent outdoor room: lighting and accessories. When you evaluate garden lighting ideas, map circulation routes, focal points, and seating. Use low-level path lights for wayfinding, spike spots to graze specimen trees, and discreet uplights to silhouette architectural planting.
Choose warm white LEDs (2700–3000K) for a domestic, inviting ambience and verify fittings are IP-rated for exterior use.
Layer decorative accessories to reinforce your design language. Limit your palette of finishes—powder-coated metal, natural stone, or timber—to avoid visual noise.
Anchor spaces with sculptural containers, weatherproof textiles, and a few statement pieces, such as a fire bowl or water feature, aligned with existing sightlines and structural axes.
Frequently Asked Questions
How Do I Create a Garden Design That’s Easy to Maintain Year-Round?
You prioritize low-input systems: select native plants, group by hydrozone, and implement drought tolerant strategies like drip irrigation, deep mulching, and permeable hardscape. Minimize lawn, specify slow-growing perennials, and standardize bed edges to streamline recurring maintenance.
What’s the Best Way to Budget for a Small Garden Makeover?
You allocate a fixed budget, then prioritize structural elements, efficient plant placement, and thorough soil preparation. You itemize materials, reuse existing hardscape, select perennial species, phase installations, and reserve contingency funds for irrigation upgrades and unforeseen site conditions.
How Can I Make My Garden Design Work With Pets or Young Children?
You integrate secure boundaries, non-toxic pet safe plants, and soft-surface play zones. You specify durable hardscaping, rounded-edge furnishings, and stable pathways, then incorporate shaded nooks, sensory planting, and child friendly features while avoiding thorny species and toxic mulches.
Which Garden Styles Suit Different Climate Zones and Weather Conditions?
You match garden styles to climate by going almost obsessively local: prioritize native plants, hyper-durable drought tolerant options in arid zones, lush woodland palettes in cool–moist regions, and rigorously wind- and salt-tolerant coastal species for maritime climates.
How Do I Adapt These Ideas for a Balcony or Rental Garden Space?
You prioritize containers, modular trellises, and lightweight planters, optimizing microclimates. For Balcony privacy, you deploy tall bamboos, panels, and climbers. Select Rental plant options in pots, self-watering systems, and non-invasive species to protect surfaces and deposits.
Conclusion
In the end, you’re the cartographer of this living atlas, charting color, structure, and light like tectonic plates and trade winds. Each focal point is a landmark, each path a trade route, each layered planting a climate zone. When you edit ruthlessly and place elements with intention, your garden stops being a random wilderness and becomes a calibrated ecosystem—efficient, legible, and unforgettable—where every leaf and line quietly reinforces the power of simple, strategic design.