


If you want a truly uniform finish, you can’t rely on paint quality alone—you need to control every variable that causes streaks and thin spots. That means understanding why lap marks appear, how surface defects telegraph through coatings, and which tools and techniques actually distribute film thickness evenly. When you start treating each coat like a controlled process instead of a quick chore, your results change dramatically—and the way you approach your next project will too.
Key Takeaways
- Prepare surfaces by cleaning, repairing, and sanding, then removing all dust so the coating can level uniformly without defects.
- Choose compatible paint and tools (nap length, brush type, or spray tip) matched to surface texture and coating viscosity.
- Maintain a continuous wet edge and overlap passes consistently to avoid lap marks and visible boundaries.
- Apply with steady speed, pressure, and stroke patterns, avoiding overworking the coating as it begins to dry.
- Control temperature, humidity, airflow, and lighting so the coating dries evenly and defects are visible for correction.
Identify What’s Really Causing Streaks

Before you can correct streaks and uneven coverage, you need to isolate their true cause by examining your tools, materials, and technique in a systematic way.
First, inspect your applicators for wear, contamination, or incompatible fiber type. Damaged or overloaded tools often create lap marks and visible passes.
Next, evaluate the product against your selected color palette and finish sheen. Highly saturated hues and higher-sheen coatings show defects more readily, so you must check whether the material’s hiding power matches the substrate and lighting conditions.
Then analyze your technique: speed, overlap consistency, and pressure. Uneven pressure or irregular wet-edge maintenance leaves bands and lighter zones.
Document each variable so you can adjust methodically rather than guessing at the source.
Prep Your Surface for Even Coverage
Before you pick up a roller, you must prepare the surface so the coating can lay down uniformly. You’ll clean and degrease the walls, repair any imperfections or holes, then sand and remove all dust to create a stable, consistent substrate.
This sequence reduces absorption differences and mechanical defects that cause visible streaks and uneven coverage.
Clean and Degrease Walls
Although it’s tempting to start painting as soon as old colors are covered, you must first remove all dust, grease, and surface contaminants to guarantee uniform adhesion and color consistency. Effective wall preparation starts with systematic surface cleaning tailored to the contamination level and substrate type.
Begin by vacuuming or wiping walls with a microfiber cloth to remove loose dust. Next, wash with a solution of warm water and a mild detergent or a dedicated degreaser, focusing on kitchens, bathrooms, and high-contact areas. Rinse with clean water to eliminate residue that could interfere with paint bonding, then allow the surface to dry completely.
For glossy or previously greasy areas, follow cleaning with a light deglossing agent to improve mechanical adhesion.
Repair Imperfections and Holes
Once the surface is clean and dry, you need to correct defects that would telegraph through the new paint. Inspect the wall under strong, raking light and circle every nail pop, crack, pinhole, and gouge. Use a suitable filler: lightweight spackle for minor flaws, setting-type compound for deeper or active cracks.
Drive protruding fasteners slightly below the surface, then fill. Color matching matters even at this stage; dark fillers can shadow through light topcoats, so prime them later.
For textured walls, practice precise texture blending so repaired zones don’t appear as flat “patch plates.”
- You notice every old dent.
- You worry repairs will still show.
- You fear mismatched patches.
- You want a seamless, professional result.
Sand and Dust Surfaces
Even with careful repairs, the surface won’t accept paint uniformly until you sand it smooth and remove all dust. Start with 120–150 grit sandpaper to level patched areas, then progress to 180–220 grit for a uniform scratch pattern. Maintain consistent pressure to avoid gouging and irregular surface porosity that causes uneven absorption and visible lap marks.
After sanding, you must control dust accumulation. Vacuum the surface with a brush attachment, then wipe it with a slightly damp, lint‑free cloth or tack cloth, turning it frequently.
Inspect under raking light to confirm no fine powder remains along edges, trim, or textures. Don’t skip sanding between primer and topcoat; a light pass and thorough de‑dusting ensure superior adhesion and smooth, streak‑free coverage.
Pick the Right Paint, Stain, or Topcoat
Because film build, open time, and pigment load all affect how a finish levels, selecting the right paint, stain, or topcoat is the first control point for avoiding streaks and uneven coverage. You’ll get predictable results only when you match product chemistry to substrate, environment, and use conditions.
Use gloss or semi‑gloss where you need maximum leveling; choose matte only when you accept slightly lower hide. Evaluate viscosity and solids content; high‑solids coatings hide well but demand stricter application control.
Balance color psychology with coverage: highly saturated or deep colors often require specialty bases to avoid lap marks.
Consider:
- The relief of a wall that hides every prior flaw
- Pride in a door that looks factory‑finished
- Confidence in low environmental impact choices
- Satisfaction when the last coat dries perfectly uniform
Choose Tools That Prevent Streaks, Not Create Them
You can prevent streaks at the source by selecting tools engineered for consistent film build and controlled release. When you opt for quality applicators and even-coverage tools—such as properly sized rollers, fine-bristle brushes, or calibrated spray tips—you reduce lap marks and thin spots.
You also need to match each tool to the substrate and coating type so the material lays off smoothly and cures to a uniform finish.
Opt For Quality Applicators
Although technique matters, the applicators you choose often determine whether a finish dries smooth or shows visible streaks and lap marks. You should select brushes, pads, and sprayer attachments engineered for the specific coating viscosity and surface profile. High‑quality filaments or foams load product evenly, release it in a controlled film, and resist shedding that causes drag lines.
Prioritize tool ergonomics so you can maintain consistent pressure and angle without fatigue. Poor grip or balance makes your wrist compensate, imprinting variations directly into the wet film.
Rigorous brush maintenance is equally critical; residue in the heel or ferrule hardens, creating ridges that track through fresh coatings.
- Avoid the dread of visible lap lines
- Prevent the anxiety of wasted product
- Eliminate frustration from rework
- Gain confidence in every stroke
Use Even-Coverage Tools
When the goal is a uniform film, tool design becomes as critical as product chemistry. You need tools that meter material consistently, not devices that leave holidays and lap marks. Select rollers with uniform nap density and precision-cut ends so they don’t create ridges at overlaps. Use high-tolerance frames that rotate freely, maintaining constant pressure.
Choose brushes with flagged tips and stable filament geometry to hold and release paint predictably, reducing reliance on corrective strokes. Mechanical aids such as calibrated roller grids and high-quality trays support consistent loading, reinforcing accurate color mixing outcomes.
Finally, pair these tools with proper paint storage practices—sealed containers, periodic agitation, and filtered pours—so the coating that reaches your applicator is homogeneous and less prone to streak-inducing variation.
Match Tool To Surface
Even with well-designed tools, mismatching the applicator to the substrate almost guarantees streaks, drag lines, and uneven coverage. You must treat tool selection as a controlled variable, not an afterthought.
Start by classifying the surface texture: smooth, semi-rough, or highly profiled. Then align nap length, bristle stiffness, or spray tip size to that profile so the film lays down uniformly and levels before set.
Use this checklist to avoid streak‑inducing choices:
- Fear of visible lap marks driving you to overwork the coating
- Anxiety about color matching causing you to press too hard with the applicator
- Frustration from roller tracks on smooth substrates
- Disappointment when brush marks telegraph through glossy finishes
Calibrate tools to both substrate and coating viscosity to maintain consistent wet-film thickness.
Master Brush Technique for a Smooth Finish
Because brushwork directly determines surface quality, mastering your technique is essential to achieving a smooth, streak-free finish and consistent coverage. Load the brush only halfway up the bristles, then tap off excess rather than scraping. Hold the handle near the ferrule for control, and maintain consistent pressure so your brush strokes stay uniform in width and opacity.
Work in manageable sections, always brushing from the wet edge into fresh substrate to support clean paint blending. Lay on paint with two to three deliberate strokes, then “tip off” lightly in one direction using just the bristle tips. Avoid overworking partially set areas, which drags and creates ridges.
Keep a steady pace, and visually inspect each section from multiple angles before moving on.
Roll Like a Pro: How to Avoid Roller Marks
Although rollers can cover large areas quickly, improper technique leaves lap marks, flashing, and uneven texture that remain visible after drying. To roll like a pro, maintain a continuous wet edge and work in controlled sections. Load the roller evenly, then apply paint in a tight “W” pattern before leveling with light, consistent passes in one direction.
Use a roller nap that supports color contrast control and accurate texture matching with adjacent surfaces. Overlap each pass by one-half roller width to blend edges and eliminate banding.
- Avoid rushed strokes that telegraph panic and frustration
- Prevent patchy walls that undermine your confidence
- Eliminate jagged overlaps that draw the eye to every flaw
- Achieve calm, uniform surfaces that feel professionally finished
Get Flawless Results With Sprayers and Foam Applicators

To achieve uniform coverage with sprayers and foam applicators, you must match the nozzle size and pattern to your product’s viscosity and target surface.
You’ll also need to control your pass speed and maintain a consistent, even overlap so each section receives the same film thickness.
Finally, you should optimize foam dwell time to maximize cleaning or coating performance without causing sagging, spotting, or residue.
Choosing the Right Nozzle
Selecting the correct nozzle is fundamental to achieving uniform coverage and preventing streaks, runs, and patchy areas. Your nozzle selection must match paint consistency, target surface, and equipment pressure rating.
For thicker coatings, choose a larger orifice; for thin materials, use a smaller size to avoid fogging and overspray. Verify fan width: narrow fans suit trim and edges, while wider fans handle walls and panels efficiently.
Consider how you want the finish to feel and look:
- Avoid the frustration of visible bands marring an otherwise meticulous project
- Gain confidence knowing atomization matches your coating’s viscosity
- Reduce rework caused by sags at edges and starved centers
- Experience the satisfaction of clean, continuous passes with predictable coverage
Always confirm manufacturer charts before installing a new tip.
Even Overlap Application Technique
When you’ve matched the nozzle to your coating, flawless results depend on how consistently you overlap each pass. Maintain a straight, controlled travel speed and keep the tip the same distance from the surface. Aim for 50% overlap: each new pass should cover half the previous fan pattern, ensuring uniform film build, accurate color blending, and reliable texture matching.
Keep your wrist locked and move your entire arm to prevent arcing, which thins material at the edges. Trigger the sprayer slightly before entering the target area and release just after exiting to avoid heavy bands.
With foam applicators, guide each ribbon edge-to-edge using the same 50% overlap concept, keeping bead width and pressure consistent across the entire panel.
Optimizing Foam Dwell Time
Consistent overlap establishes uniform coverage, but foam dwell time determines how effectively the chemistry can work before you rinse or recoat. You must match foam dwell to soil load, chemistry strength, and surface sensitivity.
Too little time leaves bonded contamination; too much time risks drying, streaking, and spotting.
Calibrate your application timing with small test sections. Observe when foam begins to thin or lose gloss; that’s your upper dwell limit. Maintain consistent thickness so dwell is uniform across panels. Adjust for temperature, airflow, and direct sun, which all accelerate drying.
Use dwell discipline to replace guesswork with control:
- Avoid the frustration of ghost streaks
- Eliminate anxiety about missed contamination
- Gain confidence in every rinse pass
- Achieve repeatable, professional finishes
Control Dry Time, Lighting, and Room Conditions
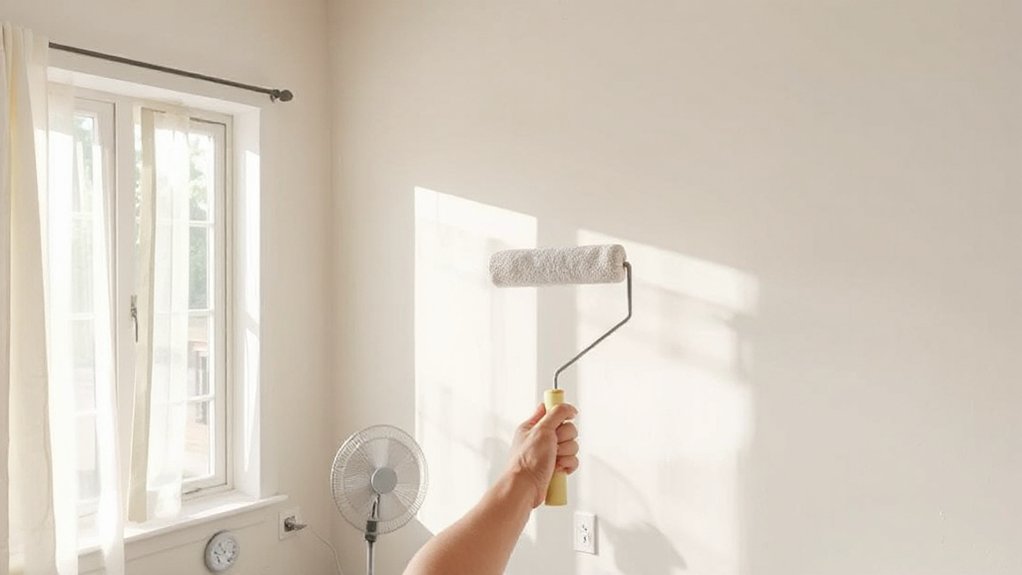
Few factors influence streaks and uneven coverage more than dry time, lighting, and room conditions, so you must manage them deliberately. You should target a stable environment: 60–75°F (15–24°C) with relative humidity around 40–55% for reliable humidity control.
Excess humidity slows solvent evaporation, causing sagging; air that’s too dry accelerates flashing and produces lap marks.
Use uniform, high-CRI lighting positioned at a shallow angle to the surface. This makes wet edges, overlap zones, and defects visible, supporting accurate color consistency and film build.
Eliminate strong backlighting and shifting daylight; they hide skips and roller lines. Minimize drafts from HVAC, fans, or open doors, which create uneven dry zones.
Maintain these conditions from application through full cure.
Fix Streaks and Uneven Coverage After They Happen
Even with controlled conditions, you’ll sometimes see streaks, lap marks, or thin spots after the film dries. First, diagnose whether the defect comes from poor color mixing, overloaded or dry tools, or substrate irregularities. Work under raking light and mark all defects with low‑tack tape or pencil.
- Frustration rises when streaks cut across what should be a flawless surface.
- Disappointment sets in as lap marks appear exactly where you thought you blended.
- Doubt grows when thin spots expose the substrate’s texture again.
Relief comes only when you methodically correct each flaw.
Correct color mixing by remixing the batch and boxing leftover material. Then feather-sand raised edges, tack-wipe dust, and recoat with well-maintained rollers or brushes, verifying tool maintenance before each pass.
Plan Your Next Project to Stay Streak-Free
How much smoother would your results be if you treated streak prevention as a design problem instead of an afterthought? Begin by mapping surfaces, lighting angles, and viewing distances. Identify high-visibility zones and specify tighter tolerances there.
Select products as a system. Confirm compatibility among primer, basecoat, and topcoat, including manufacturer-recommended film builds and recoat windows. Use color coordination to minimize contrast between substrates, undercoats, and finish coats, reducing telegraphed lap lines.
Standardize tools and techniques. Define roller nap, spray tip size, and application pattern for each substrate. Plan wet-edge sequencing so you never stop mid-panel.
Mock up finish textures on sample boards under final lighting. Document environmental targets—temperature, humidity, airflow—and enforce them during application.
Frequently Asked Questions
Can I Fix Streaks Without Fully Repainting the Entire Surface?
You can often fix streaks locally. Lightly sand affected areas, then spot-apply matching paint with controlled brush technique, maintaining uniform paint consistency. Feather edges into surrounding paint, allow drying, and evaluate under consistent lighting before deciding on broader repainting.
How Do I Avoid Streaks When Painting Over Dark, Glossy Colors?
You avoid streaks by sanding for proper surface preparation, deglossing, then applying a high‑hide bonding primer. Use consistent, overlapping strokes, maintain a wet edge, and perform controlled color blending with thin, even finish coats, allowing full drying between applications.
What’s the Best Way to Test Coverage Before Committing to a Color?
You test coverage by doing Color swatch testing on primed wall sections. Apply a consistent Sample patch application, two coats, let it fully dry, then evaluate opacity, undertone shifts, and sheen behavior under daylight and artificial lighting.
How Do Environmental Allergies or Sensitivities Affect Product and Tool Choices?
You prioritize hypoallergenic, low-VOC products, minimize airborne allergens, and avoid strong fragrances; you select synthetic, non-shedding tools, patch-test for sensitive skin reactions, and use protective gear plus air purification to maintain controlled exposure during application and cleanup.
Can Digital Tools or Apps Help Plan Streak‑Free Paint and Stain Projects?
You can release almost absurd control using digital tools: precise color matching, coverage calculators, humidity and temperature tracking, and maintenance schedulers. You’ll plan coats, drying windows, and tool maintenance so systematically that streaks virtually never appear.
Conclusion
You’ve seen how streaks usually come from hidden causes—poor prep, wrong tools, rushed technique, bad conditions. You now know how to control each variable with technical precision: smooth surfaces, compatible coatings, quality applicators, and disciplined application. But the real difference between a blotchy wall and a flawless finish comes down to one last decision: will you slow down, follow each step deliberately… and refuse to let a single careless shortcut ruin the entire surface?