
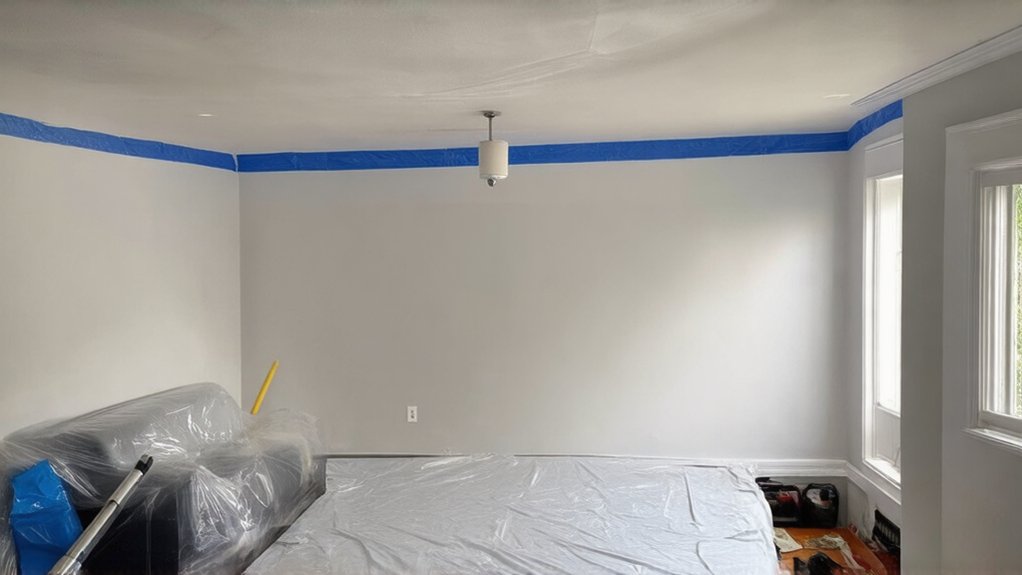

You’ll avoid most ceiling-paint disasters before you even open a can, if you treat prep as a controlled process instead of a quick chore. When you decide whether the surface is truly ready, you’ll spot issues like hairline cracks, chalky residue, or old stains that will bleed through fresh paint. From there, how you clear the room, protect floors, and choose tools will determine whether you’re working clean—or cleaning for days.
Key Takeaways
- Clear or cover furniture, lay overlapping canvas drop cloths, and seal vents and fixtures to protect the room from dust and splatter.
- Clean the ceiling, repair cracks or loose material, sand smooth, and apply stain-blocking primer to create a stable, uniform painting surface.
- Use low-VOC, flat or matte ceiling paint with the correct roller nap and a quality angled brush to minimize spatter and hide imperfections.
- Cut in edges carefully with a brush, then roll in small sections with consistent pressure, avoiding overworking drying areas to prevent lap marks and drips.
- Control dust by vacuum-sanding where possible, keeping doors closed, using damp towels at thresholds, and thoroughly HEPA-vacuuming and damp-mopping after painting.
Decide If Your Ceiling Is Ready to Paint

Before you open a paint can, evaluate whether your ceiling’s surface and conditions will let new paint adhere and cure properly. Inspect for hairline cracks, staining, peeling, or chalky residue; these indicate existing coating failure or water intrusion. Note the ceiling texture—smooth drywall, plaster, or popcorn—because each responds differently to sanding, priming, and product choice.
Next, confirm the substrate is dry and stable. Perform moisture testing near bathrooms, kitchens, and below rooflines using a moisture meter if available, or tape a plastic sheet to suspicious areas and check for condensation after 24 hours. Probe discolored spots with a screwdriver to detect softness or crumbling.
If moisture, mold, or structural instability appears, correct those issues before you even consider applying primer or paint.
Clear the Room and Protect Floors From Splatter
Before you open a paint can, you’ll clear the space and build in protection against splatter and dust. You’ll move or consolidate furniture and fixtures, lay down appropriate floor coverings and drop cloths, and seal off any vulnerable vents and ceiling-mounted components.
This preparation lets you work efficiently while preventing damage and minimizing cleanup.
Move Furniture And Fixtures
Why risk coating your belongings in dust and paint mist when a few minutes of preparation can prevent it? Start by removing as much furniture as possible to create clear access beneath the work area. When large pieces must stay, shift them to the center of the room and isolate them from the ceiling line.
Detach or loosen light fixtures, vent covers, and ceiling-mounted hardware as manufacturer instructions allow. This reduces shadowing, helps you inspect ceiling texture, and prevents overspray or roller splatter from lodging in vents and housings.
Unscrew switch and outlet plates near the ceiling, then label and bag their fasteners. Consider how your chosen paint sheen will highlight or conceal surrounding surfaces, and protect sensitive finishes accordingly before you begin any sanding or cutting-in.
Floor Coverings And Drop Cloths
Although your ceiling is the focus, the floor is the surface most likely to suffer damage, so treat it as a containment zone for dust, drips, and splatter. Start Floor protection by clearing small items, then vacuum or sweep so debris doesn’t telegraph through coverings or puncture them.
Lay heavy canvas Drop cloths in primary work areas; they resist tearing, stay put underfoot, and absorb paint instead of letting it pool. For full-room coverage, overlap edges by several inches and tape seams with low-tack painter’s tape to prevent gaps.
If you use plastic sheeting, place it over canvas, not directly on slick surfaces, to avoid slipping and shifting. Re-secure any lifted corners before you begin cutting-in.
Protect Vents And Fixtures
With the floor secured, turn your attention upward to anything that can collect dust or paint: vents, light fixtures, fans, and detectors. Start by switching off power to ceiling fixtures at the breaker. Remove vent covers and detachable light shades if possible; label screws for easy reinstallation.
For vent shielding, wrap grilles and openings with plastic and tape the perimeter so no spray or dust can enter the ductwork.
Apply fixture protection with painter’s tape and plastic film, forming tight seals around can lights, chandeliers, and fan housings. Bag fan blades individually to prevent overspray on edges.
Cover smoke and CO detectors without blocking them for extended periods; uncover them promptly once painting and dust-generating prep are complete.
Clean, Repair, and Prime the Ceiling Surface
Before you open a paint can, you need a clean, sound, and properly sealed ceiling surface so the new coating bonds reliably and looks uniform. Vacuum or dry-dust first, then wash with a mild detergent solution, rinsing carefully to prevent residue that can interfere with adhesion or affect final paint sheen.
Inspect the ceiling under bright, raking light. Mark cracks, nail pops, and failed tape joints. Cut out loose material, fill with joint compound, and sand smooth, preserving existing ceiling texture where possible.
Spot-prime stained areas with a stain-blocking primer; seal patched or bare drywall sections to equalize porosity and avoid flashing. Finally, apply a full, even coat of appropriate primer to create a uniform, stable base for finish painting.
Choose the Right Ceiling Paint and Tools
Once the ceiling is clean, repaired, and fully primed, the performance and appearance of the finish coat depend on selecting appropriate products and equipment.
Ceiling paint selection should prioritize flat or matte finishes to hide minor surface inconsistencies and glare. Choose a high-hiding acrylic latex ceiling paint formulated with low spatter and extended open time to reduce lap marks.
Opt for a bright white or slightly tinted white to improve light reflectance.
In your painting tools overview, specify a quality 3/8″–1/2″ nap roller cover for smooth to lightly textured ceilings; use 3/4″ for heavier textures. Pair it with a lightweight, adjustable extension pole.
Select a low-shed, angled sash brush for edges and around fixtures, plus a sturdy roller frame and paint tray or bucket.
Tape, Cut In, and Roll for a Clean, Even Finish
To achieve a clean, professional-looking ceiling, you’ll need to select quality painter’s tape, cut in precise edges, and roll with consistent technique.
You’ll start by choosing tape that adheres well yet removes cleanly. Then establish sharp cut lines at the wall and fixture edges.
Finally, you’ll use controlled rolling patterns to guarantee seamless coverage without lap marks or uneven sheen.
Choosing Quality Painter’s Tape
Although it seems like a small detail, choosing the right painter’s tape is critical for achieving sharp lines where your ceiling meets the walls, trim, and fixtures. You’ll get better results when you match paint tape to the surface: delicate-surface tape for fresh drywall or recently painted areas, standard or multi-surface tape for cured walls and trim.
Confirm the tape’s adhesion rating and clean-release time; longer windows help on multi-day ceiling jobs. Before taping, prioritize surface preparation: remove dust, degloss any residues, and ensure the substrate is dry so the adhesive bonds uniformly.
Apply tape in straight runs, overlapping ends slightly rather than stretching. Press the edge firmly with a putty knife or plastic card to seal out bleed-through.
Mastering Clean Cut Lines
With the right tape selected and applied, the next variable you control is how you create the cut line itself so the ceiling and walls read as a single, clean plane.
For maximum edge precision, load a quality angled sash brush with paint, then offload slightly so the bristles flex but don’t flood. Place the heel of the brush about 1/8 inch from the tape, then ease into contact, using light pressure to maintain a consistent bead.
Work in 2–3 foot sections, always pulling the brush toward you for better visual control and line masking. Overlap each pass slightly to avoid ridges.
Before the paint skins, lightly feather the edge to level any excess and maintain a crisp transition.
Rolling for Seamless Coverage
Once your cut lines are established, rolling the field of the ceiling locks everything together into a uniform, seamless surface. Load a 3/8–3/4″ nap roller, depending on ceiling texture, and work in controlled 3′ x 3′ sections. Maintain a wet edge so overlaps don’t telegraph through the final paint sheen.
Start each pass a few inches away from the cut line, then roll back into it, feathering pressure to avoid ridges. Roll in one consistent direction for the first coat, then perpendicular for the second to level stipple and conceal lap lines.
Don’t overwork partially dried areas; instead, re-roll the entire section. Frequently check for holidays under angled light and correct immediately while the paint remains wet.
Keep the Mess Down During and After Painting
Even if you prep carefully, ceiling work can scatter dust, splatter paint, and track residue through adjacent rooms, so you need a plan to control mess from the start. Focus on dust prevention, drip capture, and odor control to keep the space functional while you work and cure.
- Use a pole sander with a vacuum attachment, and immediately bag sanding debris. Keep doors closed and place damp towels at thresholds to stop dust migration.
- Choose low‑VOC paint, ventilate with a box fan exhausting outward, and run a carbon filter or HEPA purifier to manage lingering fumes.
- Roll up plastic sheeting from the edges inward, then HEPA‑vacuum and damp‑mop hard floors. Inspect trim, outlets, and vents for fine splatter before reinstalling fixtures.
Frequently Asked Questions
How Do I Safely Paint Over a Textured or Popcorn Ceiling?
You first test for asbestos, then decide between full texture removal or encapsulation. Clean and repair surfaces, sand high spots, spot-fill, then perform meticulous primer application. Finally, roll on ceiling paint with minimal pressure to avoid dislodging texture.
Can I Paint Ceilings Containing Asbestos, and How Do I Know?
You might paint it, but only after rock‑solid Asbestos identification. Don’t guess—treat it like handling dynamite. Hire a certified inspector, follow asbestos safety rules, and encapsulate only if tests confirm asbestos and local regulations allow.
What’s the Best Way to Reduce Neck and Shoulder Strain While Painting?
You reduce neck and shoulder strain by using ergonomic tools (lightweight extension pole, angled brush), keeping wrists neutral, changing grip often, taking timed breaks, and applying stretching techniques targeting trapezius, deltoids, and cervical spine before, during, and after.
How Do I Match the New Ceiling Color to Existing Wall Colors?
You match the new ceiling color by using color matching techniques: bring a wall paint chip to the store, request a custom tint in flat ceiling paint selection, then test a small section—does it dry seamlessly aligned?
Is It Safe to Sleep in the Room the Night After Painting the Ceiling?
Yes, it’s usually safe if you follow safety precautions: use low‑VOC paint, ventilate continuously with windows open and fans running, close the door, and sleep elsewhere if you smell strong fumes or feel irritation.
Conclusion
When you prep ceilings methodically, you don’t just avoid mess—you get a sharper, longer‑lasting finish. You’ve assessed the surface, protected the room, repaired, primed, and applied paint with controlled, consistent technique. Picture a small condo where the owner masked vents, used a low‑spatter roller, and vacuumed immediately after: the room was paint‑ready in the morning and fully usable that night, with no cleanup surprises and a ceiling that still looks crisp years later.