


Key Takeaways
- Set a clear kerb-appeal goal and budget, choosing a driveway style that matches your home’s architecture for a cohesive first impression.
- Fix drainage and slope first, using permeable surfaces or trench drains to prevent puddles, runoff issues, and winter icing.
- Choose materials and colours that complement the façade and roof, balancing premium appearance with durability and low maintenance.
- Improve visual sharpness with crisp edging, contrasting borders, and refined patterns like herringbone to frame the driveway and reduce tyre wear.
- Finish with tidy border planting and warm-white lighting, keeping plants low for sightlines and maintaining a clean, intentional frontage.
Set a Budget, Style, and Kerb-Appeal Goal
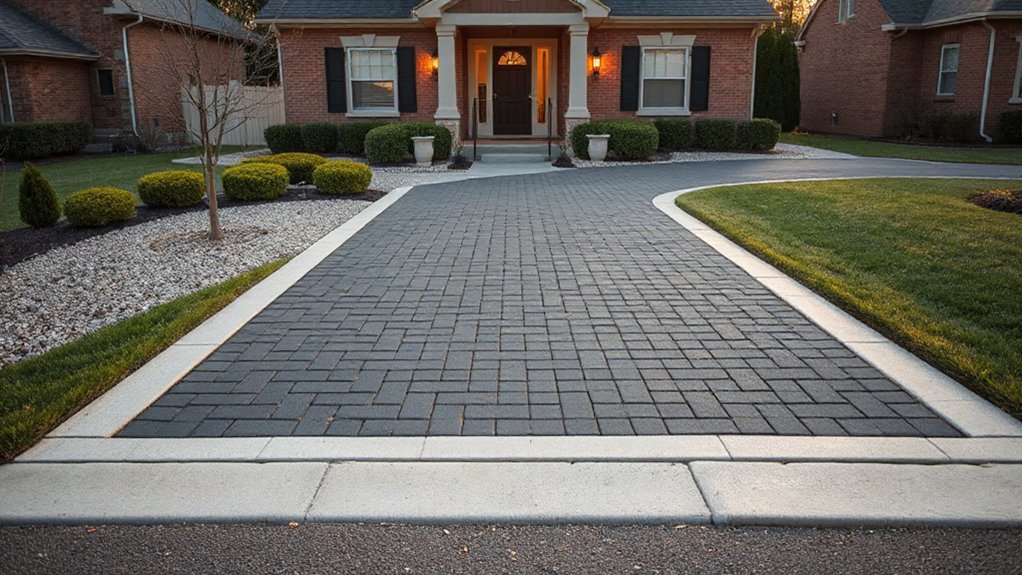
Before you choose materials or call in quotes, lock in three things: your budget, your driveway style, and the specific kerb-appeal outcome you’re aiming for. Set a hard ceiling and a small contingency, then decide what you’re optimizing: a premium look, low upkeep, or fast install.
Choose a style that matches your home’s architecture—clean modern lines, heritage edging, or a soft gravel approach—so it looks intentional, not tacked on. Define your goal in one sentence, like “make the entry feel wider” or “add contrast to brickwork,” and you’ll avoid scope creep.
Plan Garden integration early with borders, lighting zones, and planting sightlines. Prioritize Material durability for your climate and daily parking load.
Check Drainage, Slope, and Local Rules First
Before you lock in materials and edging, map how water currently moves across your front yard so you don’t create puddles or runoff issues.
Make sure the driveway slope sheds water away from your home and toward an approved drain point for a clean, modern finish that lasts.
Then check your local permit rules, crossover requirements, and stormwater guidelines now, because compliance is cheaper than rework later.
Assess Drainage Patterns
If you want a driveway that looks sharp year-round, you’ve got to map how water moves across your front yard and into the street. Walk the site after heavy rain and note puddles, soggy turf, and where water sheets off hard surfaces. Track downspouts, driveway edges, and any low spots that could feed water toward your garage or neighbours.
Then plan stormwater management before you pour or pave. You can use permeable pavers, gravel bands, or discreet trench drains to keep water from pooling and staining new finishes. Add a small rain garden or soakwell where it won’t undermine footings.
For smart runoff control, check where your council allows discharge and whether you must connect to an existing pit or easement. Document it now so approvals go faster later.
Verify Proper Driveway Slope
Where should the water go when it hits your new driveway—toward the street, a legal point of discharge, or straight back at your garage? You’ve got to lock in the right fall before you commit to a pour, pavers, or resin.
Aim for a consistent slope away from buildings so water can’t pond, seep under slabs, or ice up in winter.
Check crossfall too: a subtle side-to-side pitch can steer runoff to a channel drain or garden swale without looking “engineered.” Different driveway materials handle water differently, so confirm the slope suits your surface and sub-base.
Finally, plan landscaping integration at the edges—graded beds, permeable strips, or trench drains—so water exits cleanly and your kerb appeal stays crisp year-round.
Confirm Local Permit Rules
Once you’ve set the fall and crossfall, make sure your design also passes local permit rules—because many councils treat driveway changes as drainage work, not just a cosmetic upgrade.
Local zoning can dictate driveway width, crossover location, and even the finish you’re allowed to use, especially near heritage streetscapes or trees. Confirm permit requirements early so you don’t rip up fresh concrete to fix a non-compliant outlet.
- Check whether runoff must stay on-site, or connect to a legal point of discharge.
- Confirm maximum slope, edge set-downs, and sightline rules at the kerb.
- Ask if permeable paving earns fast-track approval or reduced fees.
- Verify utility clearances, street tree protections, and crossover reinstatement specs.
Choose Driveway Materials by Look, Cost, Upkeep
Because your driveway takes up so much of the front view, the material you choose will do most of the heavy lifting for kerb appeal—while also setting your long-term budget and weekend workload.
Start with aesthetic harmony: match tones to your façade, roof, and edging, then decide whether you want crisp modern lines (poured concrete), warm texture (pavers), or a heritage feel (gravel or clay brick).
Balance material durability against cost. Asphalt is affordable and quick, but it can soften in heat and needs sealing. Concrete lasts longer and takes stains or exposed aggregate for a premium look. Pavers cost more upfront yet handle movement and let you replace single units. Gravel is cheapest, but you’ll rake, top up, and control weeds.
Plan the Best Driveway Layout for Parking
Even if you’ve chosen a standout surface, your driveway won’t feel “right” unless the layout makes parking effortless. Start by mapping how cars actually move: arrival angle, turning circle, door swing, and sightlines to the street.
If you’re tight on space, design for easy in-and-out rather than tricky three-point turns.
- Set bay sizes for your vehicles, allowing clearance for kids’ doors and bins.
- Keep the turning radius generous; a tighter curve looks neat but parks worse.
- Use Landscaping integration to guide wheels with planting beds, not hard obstacles.
- Plan for driveway automation now—gate swing, sensors, and keypad access need setbacks.
Finally, leave room for guests and deliveries so you don’t block the footpath or garage access.
Use Colour, Patterns, and Edging for a Crisp Finish
You’ll sharpen your driveway’s first impression by choosing colours that pop without clashing with your home’s exterior.
Use patterned laying techniques—like herringbone or basketweave—to add structure and a premium, on-trend look.
Finish with strong edging so your lines stay clean, your pavers don’t creep, and the whole surface reads crisp from the street.
Colour Choices That Pop
Why settle for a flat, forgettable slab when colour, pattern, and edging can make your driveway look intentionally designed? Start by choosing a base tone that flatters your facade, then add contrast that ties into your planting for strong landscape integration.
Modern favourites include warm greys, charcoal, and sandy buff, but you’ll get the most impact by planning for seasonal color—think how autumn leaves, spring blooms, and winter light shift the look.
- Match undertones to brick, render, or roof tiles for cohesion.
- Use a darker border to frame the drive and hide tyre marks.
- Add subtle speckle or mixed aggregates for depth without noise.
- Finish with crisp edging in stone or metal to sharpen lines and prevent creep.
Patterned Laying Techniques
Colour sets the mood, but the laying pattern is what makes a driveway look deliberately designed rather than simply poured or paved. If you want instant sophistication, run a herringbone or basketweave through the main field; they handle turning tyres well and read “premium” at a glance.
For a cleaner, contemporary vibe, choose a 45-degree stretcher bond that pulls the eye toward the garage and makes narrow drives feel wider.
Add Patterned borders to frame the surface and stop the centre pattern from looking unfinished. Use a contrasting tone for subtle definition, or match colours and switch block orientation for a quieter effect.
Consider decorative inlays for a modern stripe, house-number detail, or a simple compass line that ties into your façade.
Edging For Clean Lines
Although the main field gets the attention, sharp edging is what makes a driveway look finished and stay that way. You’ll get cleaner geometry, better restraint at the borders, and stronger kerb appeal from the street.
Match your edging to your paving colour and pattern so the whole surface reads as intentional, not patched together. For trend-forward landscape integration, treat the edge as a design feature that ties into beds, paths, and lawn lines.
- Choose edging materials that suit traffic: concrete kerbs, setts, steel, or brick soldier courses.
- Set a contrasting border colour to frame the field and highlight patterns.
- Bed edging on concrete and haunch it to stop creep and cracking.
- Keep curves consistent with a string line or radius templates for crisp, repeatable lines.
Add Driveway Lighting and Clean Border Planting
Once you’ve upgraded the surface, tidy borders and well-placed lighting will sharpen the whole driveway’s kerb appeal after dark and in daylight.
Start with layered landscape lighting: low bollards to guide cars, discreet spike spots to wash planting, and step lights if you’ve got level changes. Choose warm-white LEDs and keep fittings consistent in finish for a modern, premium look. Aim beams away from windows to avoid glare.
Then refine border planting so the edges look intentional, not overgrown. Use evergreen structure (box alternatives, grasses, compact shrubs) and repeat them in simple rhythms along the run.
Add seasonal colour near the entrance, but keep heights low for sightlines. Finish with fresh mulch or gravel for crisp contrast.
Protect the Surface With Sealing and Maintenance
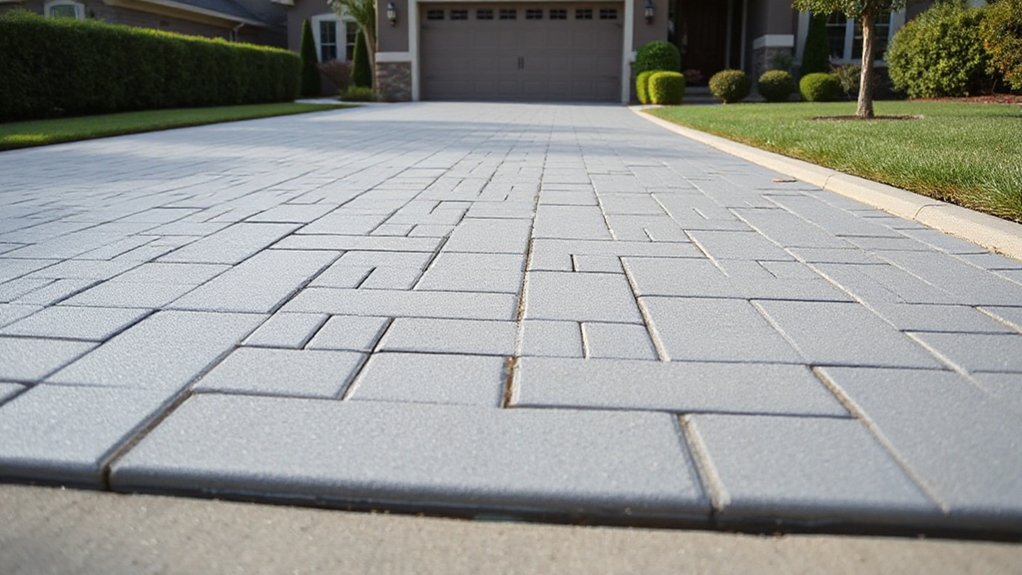
With your lighting and borders looking sharp, lock in that fresh, premium finish by protecting the driveway surface. Surface sealing deepens colour, resists stains, and adds that showroom sheen buyers notice. Choose a breathable sealer suited to your material, then keep it performing with simple maintenance routines that fit your schedule.
- Clean first: sweep weekly and rinse grit before it abrades the top layer.
- Seal smart: apply Surface sealing in dry weather, following cure times exactly.
- Spot-treat fast: blot oil, tannins, and rust marks before they set.
- Refresh on rhythm: recoat every 2–4 years, or sooner in high-traffic zones.
You’ll keep texture crisp, joints tidy, and the whole frontage looking intentionally finished year-round.
Driveway Mistakes That Ruin Kerb Appeal Fast
Even if you’ve chosen the right material and nailed the finish, a few common driveway slip-ups can tank kerb appeal in days.
Let weeds colonise joints, ignore oil stains, or leave puddles from poor fall and you’ll signal neglect fast.
Skimp on edging and your surface will creep, crack, and look unfinished.
You’ll also lose points when the driveway fights the house: mismatched colour tones, oversized patterns, or cheap-looking borders date the frontage.
Don’t forget Garden integration—hardscape that slices through planting beds without gradual change looks harsh.
Aim for Landscaping harmony by tying lines to paths, gates, and front steps, then soften edges with gravel strips or low planting.
Finally, avoid clutter: bins, trailers, and patchy repairs read instantly from the street.
Frequently Asked Questions
How Long Does a New Driveway Installation Usually Take?
You’ll usually finish a new driveway in 2–7 days, depending on prep and weather. Choose driveway materials early and lock cost estimation upfront. Concrete runs longer; asphalt’s faster. Pavers take extra time for compaction.
Do I Need to Remove the Old Driveway Before Installing a New One?
You don’t always need to remove the old driveway; you can overlay if it’s stable. You’ll assess driveway materials, drainage, and cracks. Removing improves longevity but increases cost and environmental impact from disposal and trucking.
Will a New Driveway Increase My Home’s Resale Value?
Yes, a new driveway can boost your home’s resale value by improving first impressions and signaling quality. Pair it with smart landscaping ideas and consistent driveway maintenance, and you’ll attract buyers and support stronger offers.
Can I Install a Driveway in Winter or During Heavy Rain Seasons?
Sure, you can install a driveway in winter or heavy rain—because mud’s always fashionable. You’ll need winter installation planning, fast-curing materials, and rain proofing techniques like graded drainage, compacted subbase, and covers.
How Soon Can I Park on the Driveway After It’s Installed?
You can usually park after 24–48 hours on concrete and 24 hours on asphalt, but wait 7 days for full strength. Follow driveway maintenance, delay driveway sealing 3–6 months, and avoid heavy vehicles.
Conclusion
You boost kerb appeal with a “simple” new driveway—then discover the real glamour is in budgets, drainage, and local rules. Set your style goal, pick materials that match your upkeep tolerance, and plan parking flow before you chase patterns and edging. Add subtle lighting and tidy planting so the finish looks intentional, not busy. Seal it, maintain it, and you’ll avoid the fastest irony of all: a stunning driveway that ages badly.