


If your living room looks good but doesn’t quite work, you likely skipped function-focused planning. Before you buy another sofa, you need to audit how you actually use the space, map circulation paths, and align furniture with sightlines, focal points, and lighting. When you treat the room like a small interior architecture project—rather than decor-only—you can systematically fix dead zones, bottlenecks, and awkward seating. The process starts with how you…
Key Takeaways
- Start by listing and ranking how you actually use the room, then draft a scaled floor plan with furniture, circulation paths, and outlets marked.
- Establish a clear focal point—fireplace, media wall, or large artwork—and arrange major seating to face or relate directly to it.
- Create comfortable conversation groupings with sofas and chairs in U or L shapes, keeping 6–8 feet between opposing seats and clear 36-inch walkways.
- Use rugs, low consoles, and lighting changes to subtly define separate zones (living, dining, work) without adding visual bulk.
- Layer ambient, task, and accent lighting so each zone is well lit for its function while reinforcing the room’s visual hierarchy and flow.
Start With How You Actually Use Your Living Room
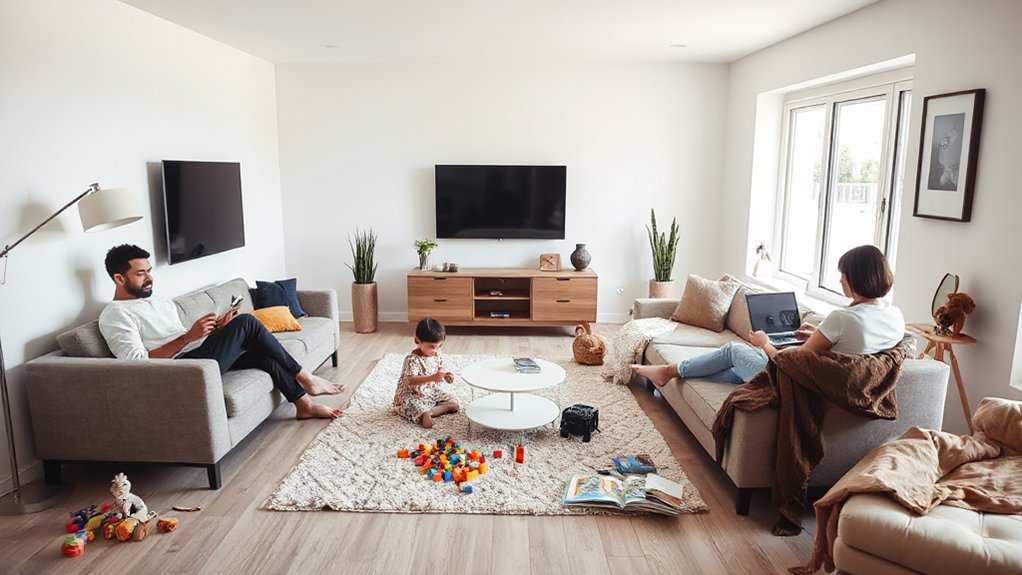
Before you sketch a floor plan or buy furniture, define how you actually live in the space—reading, watching TV, hosting guests, working, or supervising kids—because each function drives a different layout strategy. Audit your daily patterns: where you naturally sit, how you circulate, and what you need within arm’s reach.
List primary and secondary activities, then rank them. For example, if streaming and gaming dominate, you’ll prioritize ideal sightlines, acoustic control, and minimal glare. If you entertain, you’ll emphasize conversation groupings and flexible perches.
Align decorative accents and color schemes with function: calming hues and soft textures for reading zones, higher-contrast palettes and durable finishes for family-heavy use.
This programmatic brief becomes your performance baseline for every subsequent design decision.
Map Your Living Room Layout and Key Features
Once your functional priorities are clear, translate them into a scaled plan that maps the room’s envelope and immovable constraints. Measure every wall, window, door swing, column, radiator, and built-in, then draft a floor plan at 1/4″ = 1′-0″ or similar scale.
Plot existing outlets, switches, and data ports; they’ll drive furniture placement and lighting options. Layer in primary circulation paths with minimum 36″ clearances. Block in major seating, storage, and media zones using scaled furniture templates, confirming adequate legroom and sightlines.
Note where natural light enters and where glare may hit screens. Annotate how proposed color schemes will interact with daylight and artificial light, flagging walls or zones that may need different finishes or higher light levels.
Choose a Focal Point That Anchors the Room
Why does every effective living room start with a clear focal point? Because your focal point selection determines visual hierarchy, circulation paths, and how every other element reads in the space. Identify the strongest architectural feature first—fireplace, large window, built-in shelving, or media wall—and treat it as your room centerpiece.
If the shell lacks a natural anchor, create one: a large-format artwork, an oversized mirror, or a scaled media unit centered on the primary wall. Validate the focal point by checking sightlines from all main entry points; you should register it immediately upon entry.
Confirm proportional balance: the room centerpiece should occupy roughly one-third of its hosting wall, with adequate negative space around it to prevent visual clutter.
Arrange Seating for Easy Conversation and Comfort
Even in a compact living room, your seating plan must prioritize face-to-face interaction, clear sightlines to the focal point, and unobstructed circulation.
Start by defining a primary conversation zone with a sofa and two chairs arranged in a modified U or L configuration, oriented to the focal point without forcing viewers to twist.
Maintain 6–8 feet between opposing seats to keep voices at a comfortable level.
Position side tables within 18 inches of each seat for functional reach.
Use cushion placement strategically: firmer back cushions maintain ergonomic support; softer accent cushions adjust lumbar depth for different users.
Ensure each primary seat has a direct visual connection to others, eliminating “orphan” chairs that fall outside the main seating arrangement.
Plan Clear Traffic Routes Through Your Living Room
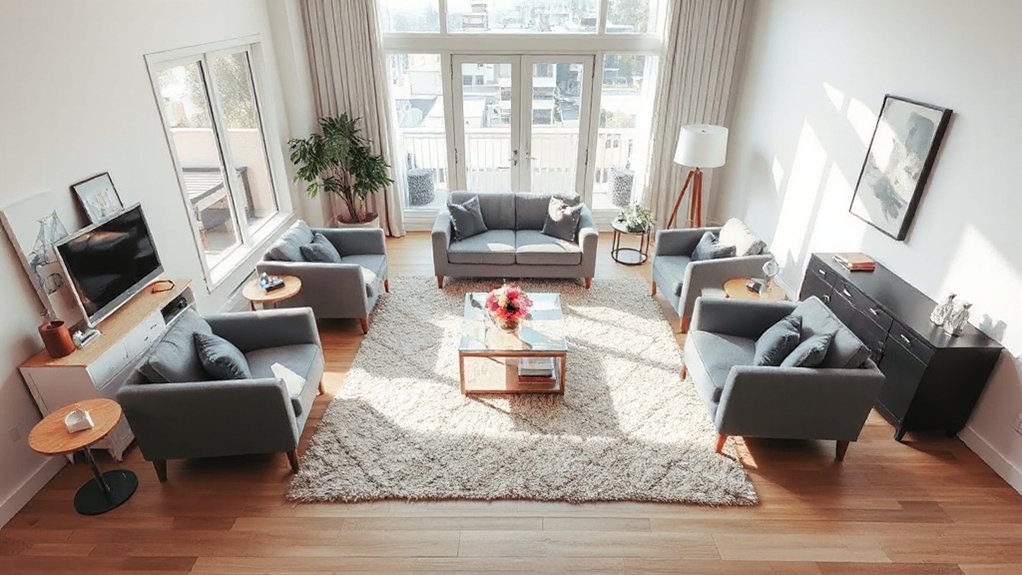
You’ll optimize your living room layout by first mapping the natural walking paths between key zones like seating, entry, and circulation to adjacent rooms.
Maintain clearances at doorways and major access points, ensuring you don’t constrict egress with bulky pieces or awkward angles.
Then arrange furniture to support a continuous flow—channeling movement around, not through, primary seating groups.
Map Natural Walking Paths
Once you’ve determined your room’s focal points, map the natural walking paths to guarantee people can move through the space without obstruction or visual clutter. Identify origin points (sofa, entry, window seats) and destinations (media wall, reading nook, balcony) and sketch the most intuitive routes between them.
Aim for primary circulation paths of 36–42 inches and secondary paths of at least 30 inches.
Align these routes with natural lighting and views so movement feels intentional, not accidental. Avoid routing traffic directly through key acoustic zones, like conversation groupings or media-listening areas, to reduce sound disruption.
Position rugs, side tables, and floor lamps outside these paths, using furniture edges to “draft” corridors that guide flow while preserving usable seating depth.
Keep Doorways Unblocked
How do you maintain generous flow without sacrificing usable square footage? Start by treating each opening as a circulation node. Establish minimum doorway clearance of 36 inches for primary passages and 30 inches for secondary ones. Measure from the edge of trim to the nearest obstruction, not just the wall plane.
Align furniture placement so no piece projects into these clearances. Keep armchairs, consoles, and plants at least a few inches outside the required zone to prevent “visual narrowing.” Avoid placing the corner of a coffee table in the natural entry line from any doorway.
If you’re tight on space, use wall-hugging profiles—slim consoles, low benches, or wall-mounted storage—so you preserve code-adjacent clearances while still delivering functional surfaces.
Arrange Furniture Flow
With doorways calibrated as fixed circulation nodes, shift to mapping the full traffic grid across the room. Establish primary paths—typically 36–42 inches wide—linking doorways, seating clusters, and focal points. Treat these as non-negotiable corridors that dictate furniture placement, not afterthoughts.
Position sofas and chairs so traffic moves around seating zones, not through conversation groupings. Float key pieces off walls when necessary, maintaining clear passage behind or beside them. Use area rugs to define circulation edges and prevent overlap between routes and relaxation zones.
Align side tables, floor lamps, and consoles outside main pathways to maintain decor harmony while avoiding collisions. In tight rooms, specify slim-profile pieces and nesting tables to preserve flow without sacrificing functional surface area.
Balance Style, Storage, and Everyday Practicality

Although a living room often showcases your aesthetic, its layout succeeds only when style, storage, and daily function work as an integrated system. Begin by mapping use-zones—media, conversation, reading—and assign each zone task-specific storage: closed cabinetry for media, drawers for remotes, baskets for throws.
Specify furniture with integrated storage: a lift-top coffee table, a media console with cable management, side tables with shelves. Maintain a 1:1 ratio between visible display and concealed storage so surfaces don’t become landing zones for clutter.
Use consistent color schemes to visually connect storage pieces with seating. Reserve open shelving for curated decorative accents—books, art, sculptural objects—grouped by scale and tone. This keeps daily essentials accessible while preserving a clean, intentional visual hierarchy.
Adjust Your Living Room Layout for Small or Open Spaces
Even when square footage is limited or your living room flows into adjacent zones, prioritize layout decisions that control circulation, define boundaries, and scale furnishings correctly.
Start Furniture placement by identifying a primary axis: TV wall, view, or fireplace. Align your largest seating piece here, then maintain 30–36 inches of clear walking path around it.
Use apartment-scale sofas, nesting tables, and wall-mounted storage to free floor area.
Float furnishings on rugs to visually separate living from dining or work zones in open plans. Deploy back-to-back consoles or low shelving as subtle dividers without adding bulk.
Integrate Lighting strategies—ceiling fixtures for general illumination, floor lamps for task zones, and wall sconces to save surface space and reinforce each zone’s perimeter.
Frequently Asked Questions
How Do I Design a Living Room Layout That Supports Kids and Pets Safely?
You prioritize rounded-edge pieces, stable furniture placement, and defined circulation paths. You zone play, seating, and storage to protect traffic flow, anchor rugs, conceal cords, specify washable performance fabrics, and avoid tip hazards with low, soft, modular components.
What’s the Best Layout for Maximizing Natural Light Without Sacrificing Privacy?
Prioritize perimeter seating, not windows; this preserves privacy while promoting light flow. Optimize window placement with staggered sill heights, sheer layered treatments, and reflective surfaces opposite glazing, then position taller storage as visual buffers along circulation paths, not light-critical façades.
How Can I Hide Cords and Tech Clutter While Keeping Outlets Accessible?
You route concealed wiring through cable raceways and recessed floor boxes while maintaining outlet accessibility with furniture-mounted power strips, grommeted pass-throughs, and wall plates. You label circuits, use low-profile surge protectors, and standardize cord lengths for clean, serviceable installations.
How Do I Make Mismatched Furniture Work Together in One Coherent Layout?
You create coherence by standardizing proportions, employing deliberate furniture pairing, and enforcing strict color coordination. Repeat one dominant material, align seat heights, anchor everything on a single large rug, then balance visual weight symmetrically or via a clear focal axis.
What Layout Changes Make a Rental Feel Customized Without Permanent Renovations?
You re-route circulation like a river, float furniture off walls, and define micro-zones with rugs. You deploy modular storage, layered color schemes, and movable decorative accents, creating a fully customized, reversible layout within rental constraints.
Conclusion
When you step back and scan the room—sofa aligned to the focal wall, traffic lines clean, lighting layered like a stage plot—you’ll see a layout that works as hard as you do. Every zone reads clearly, like a well-drafted floor plan brought to life. Keep iterating: shift a chair, re-aim a sconce, resize a rug. With each precise adjustment, your living room performs better, supporting real habits instead of just looking good on paper.