


Your small bathroom can gain what feels like several square feet without moving a single wall when you treat its layout like a precision engineering problem. When you map the room’s footprint, circulation paths, and existing services, you’ll see how a walk-in shower, wall-hung vanity, and compact toilet can interlock efficiently. Add strategic glazing, sliding doors, and integrated storage, and the space starts to work harder than you’d expect—once you decide where to begin.
Key Takeaways
- Use wall-mounted or floating vanities, in-wall toilets, and compact fixtures to free floor space and make the bathroom feel larger.
- Replace hinged doors with pocket or sliding doors and frameless glass shower screens to reduce clearance needs and maintain open sightlines.
- Plan the layout around uninterrupted wall spans: place the toilet on a short wall, optimize circulation, and integrate recessed storage niches.
- Choose large-format, low-contrast tiles, high-LRV light colors, and floor-to-ceiling finishes to visually expand height and width.
- Layer bright ambient lighting with vertical sconces and oversized frameless mirrors to eliminate shadows and double the perceived space.
Start With Your Bathroom’s Size and Layout Limits
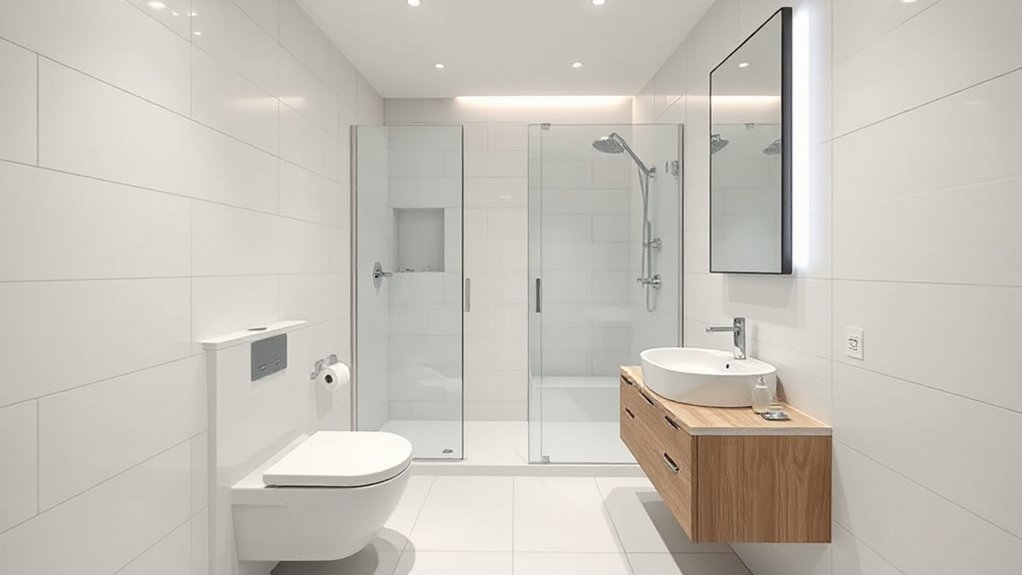
Before you sketch a single layout, quantify the exact size and structural limits of your bathroom. Measure wall-to-wall dimensions, ceiling height, window and door placements, and fixture clearances. Note plumbing stacks, vent locations, and electrical points you can’t relocate cost‑effectively.
Next, map circulation paths and minimum code-compliant clearances for the toilet, vanity, and storage. This prevents cramped movement and awkward door swings. Lock in the fixture footprint before refining Color schemes and Material choices.
Use a scaled floor plan to test alternate configurations, ensuring efficient sightlines and maximum usable surface area. Prioritize uninterrupted wall spans for mirror, lighting, and vertical storage.
When constraints feel tight, adjust fixture width, door swing direction, and built‑in depths rather than forcing oversized elements.
Go All-In on a Walk-In or Corner Shower
When you commit to a walk-in or corner shower, you open significant spatial efficiency in a small bathroom footprint. You’ll maximize walk-in shower space with a linear drain, minimal-threshold entry, and frameless glass that eliminates bulky visual breaks.
In a tight corner, you can specify a neo-angle base, compact door swing, and integrated storage niches to convert otherwise dead space into a high-performance shower zone.
Maximizing Walk-In Shower Space
A walk-in or corner shower lets you reclaim valuable square footage by eliminating bulky tubs and inefficient enclosures. To maximize the footprint, you’ll prioritize clear sightlines, integrated storage, and seamless drainage so every inch performs.
Specify a frameless glass panel to reduce visual clutter and maintain depth perception. Use large-format tiles and a linear drain to streamline the floor plane. Incorpor incorporate luxury fixtures with compact profiles—thermostatic valves, handheld sprays, and a low-profile rain head—to concentrate performance without crowding.
- Recessed wall niches sized to your tallest bottles, aligned on a single axis
- Bench integrated into the plumbing wall, cantilevered to keep floor space open
- Ambient lighting in the ceiling and niche, on dimmers, to enhance volume perception
Smart Corner Shower Solutions
Two of the most efficient moves you can make in a compact bath are committing to a true walk-in or a precisely planned corner shower that compresses the wet zone into a minimal footprint. A frameless glass corner enclosure aligned to a 36″ or 32″ square or neo-angle base keeps circulation clear while meeting code clearances.
Specify a smart shower system with a low-profile linear drain and wall-mounted digital controls so you can place valves near the entry and keep plumbing compact. Use a recessed niche on the long wall, not in the corner, to prevent visual clutter.
Run floor tile continuously into the pan, slope at 1/4″ per foot, and keep thresholds flush to maintain accessibility and visual expansion.
Choose the Right Small Bathroom Vanity Layout

When you choose a small bathroom vanity layout, you need to balance fixture footprint, circulation clearance, and storage capacity with precision.
You’ll evaluate space‑saving vanity styles, including wall‑mounted and narrow-depth units, alongside storage-focused sink options that integrate drawers, shelves, or under-basin organizers.
In tighter floor plans, you should also consider clever corner vanity layouts that free up central floor space while maintaining ergonomic access to plumbing and adjacent fixtures.
Space-Saving Vanity Styles
How you configure the vanity in a compact bathroom largely determines how efficient and comfortable the room feels. To maximize floor clearance and circulation, select a narrow-depth unit, pair it with durable vanity material, and streamline countertop designs so every inch performs. Focus on silhouettes that visually lighten the envelope while still supporting daily routines.
- Wall-mounted vanities float above radiant tile, exposing more floor and making a tight footprint feel broader and more open.
- Corner vanities exploit otherwise dead space, maintaining legroom along the main traffic path while still anchoring the plumbing wall.
- Console-style vanities with slender legs and minimal carcasses reduce visual bulk, showcasing expressive countertop designs and finishes, and aligning neatly with compact toilets and shower entries.
Storage-Focused Sink Options
After you’ve defined the vanity’s footprint, the next performance variable is how the sink configuration supports storage. Opt for a single, offset basin to free up uninterrupted counter space and allow full-depth drawers beneath. Wall-mount compact fixtures to reclaim floor area for roll-out hampers or open shelving.
Specify a rectangular, shallow sink with a rear-set drain; this keeps the plumbing tight to the wall and maximizes drawer volume. Choose a vanity base with multipurpose cabinets that integrate pull-out organizers, internal drawers, and vertical partitions for tall bottles.
Prioritize full-extension hardware so you can access every inch. Where possible, integrate a sink with a slim profile to maintain clearance while preserving under-basin storage for cleaning supplies and bulk toiletries.
Clever Corner Vanity Layouts
Although corners often become dead space in small bathrooms, a well-planned corner vanity can reveal valuable square footage and improve circulation. By rotating the sink into the corner, you free up linear wall length for fixtures, towel bars, or shallow storage. You’ll also shorten traffic paths and reduce congestion at the door swing.
Specify corner cabinetry that maximizes vertical volume with deep, triangular compartments or lazy-susan-style organizers. Pair it with angled countertops that taper toward the entrance to prevent hip collisions and maintain visual lightness.
Visualize:
- A wall-hung corner vanity exposing more floor tile and making the room feel larger.
- Integrated mirrored corner medicine cabinets increasing both storage and reflectivity.
- A compact corner basin aligned with the toilet sightline to streamline clearances and code-compliant spacing.
Fit the Toilet Smartly Into a Tight Floor Plan

When you’re working with a compact floor plan, positioning the toilet correctly becomes a space-planning exercise as much as a plumbing decision. Start by mapping clearances on your floor plan: at least 15 inches from centerline to each side wall and 21 inches of front clearance. This ensures code-compliant, comfortable toilet placement.
Use in-wall or corner cisterns to reclaim floor area and visually lighten the footprint.
In a narrow room, align the toilet on the short wall, opposite the entry, to prevent a cramped circulation path. Consider a wall-hung pan with a concealed tank to raise the sightline and preserve legroom.
Always coordinate vent stacks, waste line slope, and structural joists early so relocations don’t become expensive revisions later.
Use Sliding Doors and Glass to Open Up Space
Instead of allowing a swing door to consume valuable floor area, convert to a sliding or pocket door and treat every glazed surface as a tool for light transfer and spatial depth. Sliding doors eliminate the clearance arc, freeing wall length for fixtures and improving circulation. Specify high-quality tracks and soft-close hardware to guarantee silent, precise operation in tight quarters.
Use glass partitions to delineate wet and dry zones without visual interruption. Clear or low-iron glass maximizes luminance, while minimal metal profiles keep sightlines continuous.
- Replace a hinged entry with a wall-hung pocket system aligned flush to the wall plane.
- Install a full-height glass shower screen instead of an opaque enclosure.
- Run a glass partition from vanity to shower to create an airy, contiguous volume.
Build In Storage Without Crowding the Room
Clear sightlines and efficient circulation only go so far if loose items still clutter every surface, so integrate storage directly into the architecture of the room. Prioritize recessed niches in stud walls for toiletries and reserve floor area for movement. Specify custom cabinetry with shallow depths and integrated toe-kick drawers to capture underutilized space.
Use vertical shelving above the toilet or beside the vanity to stack towels and bulk supplies while keeping the footprint compact. Incorporate hidden compartments behind mirrored panels or flush wall doors to conceal cleaning products and personal items.
Opt for wall-hung vanities and tankless or in-wall cisterns to free up floor plane. Maintain consistent shelf heights and modular bins so every item has a dedicated, easily accessible zone.
Style Tricks That Make Small Bathrooms Feel Bigger
Although layout and storage strategies define how efficiently a small bathroom works, visual manipulations determine how expansive it actually feels. You can deploy precise color schemes, lighting techniques, and material choices to visually push the walls outward and raise the ceiling line.
Use a restrained, high-LRV (light reflectance value) palette on walls, ceilings, and large fixtures so surfaces visually merge instead of fragmenting the room. Layer illumination: pair bright, diffused ambient light with vertical sconces at eye level to eliminate harsh shadows and improve depth perception.
- Floor-to-ceiling curtains or tiled shower walls that draw the eye upward
- Large-format, low-contrast floor tiles that reduce grout lines and visual noise
- An oversized, frameless mirror that doubles sightlines and amplifies light
Frequently Asked Questions
How Can I Soundproof a Small Bathroom for Privacy in a Shared Home?
Install a solid-core door, apply perimeter weatherstripping, and mount acoustic door sweeps. Add mass-loaded vinyl to walls, seal gaps with acoustic caulk, and use dense rugs and soft furnishings—reliable soundproofing techniques and privacy solutions for shared homes.
What Small-Bathroom Layouts Work Best for Aging-In-Place or Accessibility Needs?
You prioritize curbless showers, 36-inch doorways, and T-shaped clearances. Install wall-hung toilets, lever handles, and grab bars. Integrate recessed storage solutions, non-slip flooring, contrasting finishes, and low-glare decorative fixtures to maximize maneuverability, safety, and long-term accessibility.
How Do I Plan Lighting Layouts for Windowless Small Bathrooms?
You treat it like a windowed space: layer task, ambient, and accent lighting. Simulate natural light with high-CRI, 3000–4000K LEDs, add mirror-integrated task lights, then specify moisture-rated decorative fixtures for balanced vertical and ceiling illumination.
What Ventilation Options Prevent Mold in Compact Bathrooms Without Windows?
You prevent mold by optimizing exhaust fan placement near the shower, specifying a high-CFM, continuous or humidistat-controlled unit, ensuring ducting vents outdoors, and integrating active humidity control via programmable fans, sealed penetrations, and regular post-shower purge cycles.
How Do I Budget and Phase a Small Bathroom Remodel Over Time?
You phase the remodel like chapters: first tackle hidden systems and moisture control, then upgrade bathroom fixtures, then optimize storage solutions, finally finish surfaces. You budget by prioritizing plumbing, ventilation, waterproofing, deferring cosmetic upgrades and premium materials.
Conclusion
When you treat every inch as a design variable, a small bathroom performs like a full‑scale space. You’ve optimized circulation, specified compact fixtures, and integrated storage into the envelope instead of the footprint. That level of planning matters: a well‑designed layout can boost perceived size by up to 30% through reflectance, continuity, and sightlines alone. Now you can apply these principles systematically, so even the tightest floor plan feels streamlined, bright, and highly functional.