


When you modernise a 1950s detached house in the UK, you’re working with solid masonry, modest insulation, Crittall or early aluminium windows and often undersized services. You need to decide what you’ll protect – brickwork bonds, stair details, room proportions – and what you’ll upgrade, from cavity insulation to a new consumer unit and improved glazing. Get this balance wrong and you risk damp, cold bridges and planning issues, so it’s worth understanding…
Key Takeaways
- Upgrade insulation, glazing, and airtightness first to improve EPC performance, comfort, and running costs while planning appropriate ventilation.
- Modernise services with new electrics, plumbing, and efficient heating, allowing for solar PV, EV charging, and future smart-home integration.
- Reconfigure layout using broken-plan openings, retaining key structural walls, stairs, chimney breasts, and original circulation hierarchy.
- Preserve character-defining features—Crittall-style windows, brickwork, roof form, and proportions—while updating finishes with sympathetic colours and materials.
- Enhance kerb appeal and usability with considered landscaping, improved driveway and boundaries, and planting that complements the 1950s architecture.
Defining Your Goals for a 1950s Detached House
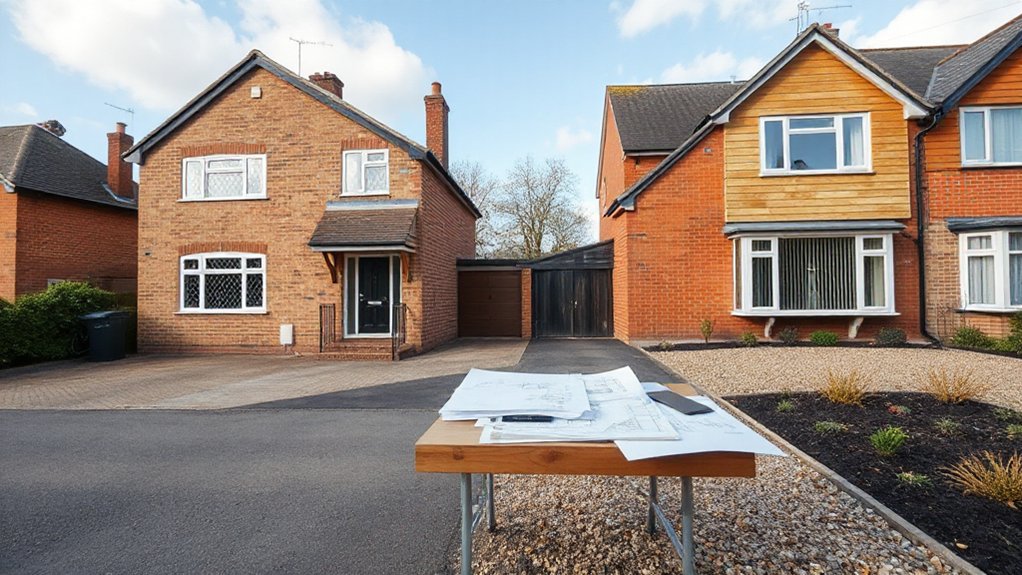
Before you touch a wall or specify a single fitting, define exactly what you want your 1950s detached house to become in the context of UK regulations, climate, and market expectations.
Decide whether you’re targeting improved EPC performance, accessibility, multi‑generational living, or future resale.
Clarify which elements deliver Vintage charm and which undermine efficiency or comfort. Identify original features worthy of architectural preservation—Crittall-style windows, brickwork patterns, timber staircases—so you can integrate them with compliant upgrades to insulation, airtightness, and ventilation.
Establish priorities: energy performance vs. floor‑area gains; open‑plan flow vs. acoustic separation; low‑carbon systems vs. installation complexity.
Align these with likely planning constraints, local comparables, and your budget, so every design decision supports a coherent, value‑led brief.
Assessing Structure, Layout and Services Before You Start
With a clear brief in place, you can interrogate how your 1950s detached house is actually built, planned and serviced, so design intent aligns with structural reality and current UK standards.
Commission a full measured survey and structural report, focusing on cavity wall construction, slender timber floors, embedded steel and any past alterations.
Ask your engineer to identify loadbearing walls, foundations and roof form, and where structural reinforcement will be needed for new openings or heavier finishes.
In parallel, map circulation, daylight paths and room adjacencies, noting where the existing layout conflicts with contemporary use but still offers Historical preservation value.
Finally, commission condition reports on electrics, plumbing, drainage and gas, checking capacity, routing and compliance before you commit to any design moves.
Modernising the Layout While Keeping Mid‑Century Character
Once you understand how the house is put together, you can begin to rework the plan so it supports contemporary living without erasing its 1950s DNA. In a UK context, start by identifying load‑bearing walls, chimney breasts and stair positions that define the original hierarchy of rooms.
Where possible, create broken‑plan arrangements: widen openings between kitchen, dining and sitting rooms rather than fully knocking through.
Retain key mid‑century features that deliver vintage charm—stone fireplaces, timber stair balustrades, Crittall‑style doors—then align circulation so these become focal points.
Zone open areas with changes in floor finish, built‑in storage and carefully scaled interior decor.
Prioritise natural light by borrowing it through glazed screens and internal fanlights while keeping window cills, proportions and skirting profiles consistent.
Boosting Insulation, Windows and Overall Energy Performance
You’ll get the biggest step‑change in comfort and running costs by treating your 1950s home’s thermal envelope as a complete system, starting with a fabric‑first assessment of walls, roof, floors and junctions common in UK housing of this era.
From there, you can specify new or upgraded glazing—such as Part L‑compliant double or triple‑glazed units with warm‑edge spacers and appropriate solar control—to enhance performance without compromising façade character.
Finally, you’ll need to balance improved airtightness with properly designed ventilation, typically via demand‑controlled or MVHR systems, to avoid condensation, preserve indoor air quality and lock in efficiency gains.
Assess Existing Thermal Envelope
How efficiently does your 1950s detached house actually hold heat before you start upgrading anything else? You first need a clear baseline of thermal performance. Commission a detailed energy survey or EPC and supplement it with an infrared thermographic scan during a cold spell; this reveals cold bridges at eaves, corners, and solid floor junctions typical of post‑war construction across the UK and Ireland.
Open up discreet inspection points in loft, eaves, and service voids to confirm cavity presence, insulation continuity, and damp issues. Record U‑values for walls, roof, and floors, plus air‑change rates via blower‑door testing. Map these findings onto your floor plans so you can prioritise measures that deliver the best energy efficiency gains while respecting original proportions, rooflines, and façade character.
Upgrading Windows And Glazing
Although post‑war detached houses often retain their original charm, their single‑glazed timber or early aluminium windows typically perform very poorly by modern standards, leaking heat, draughts, and noise. You should begin by auditing existing openings, noting orientation, frame condition, and original window styles, as these strongly influence heat loss and solar gains.
In a UK context, aim for high‑performance double or triple glazing with low‑E coatings, warm‑edge spacers, and argon or krypton fill. Prioritise south‑facing elevations for improved g‑values and carefully control east/west solar gain.
Select glazing materials and frames as a system: timber‑aluminium composites or high‑quality uPVC deliver low U‑values and reduced maintenance, while slim‑profile sashes or casements can echo 1950s proportions, preserving character while considerably boosting thermal performance and acoustic comfort.
Improving Airtightness And Ventilation
Once you’ve upgraded insulation and glazing in a 1950s detached house, the next critical step is tightening the building envelope while providing controlled, reliable ventilation. You start by identifying air leakage paths: suspended timber floors, loft hatches, chimney breasts, and junctions between cavity walls and intermediate floors.
Use blower-door testing to quantify leakage and guide targeted sealing with airtight membranes, tapes, and grommets that comply with local building regulations.
As you reduce infiltration, you must design ventilation systems that maintain indoor air quality and protect the fabric. In a UK context, consider demand-controlled extract in wet rooms or, for deeper retrofits, whole-house MVHR sized to your calculated design air-change rate.
Integrate discreet duct routes and diffusers to complement the house’s original architecture.
Heating, Plumbing and Electrics Upgrades for a 1950s Home
When you modernise a 1950s detached house in the UK, upgrading the heating, plumbing and electrics isn’t just desirable, it’s essential to meet current safety standards, efficiency targets and comfort expectations.
You’ll typically replace an ageing boiler with a condensing model or low‑temperature system designed for good radiator placement and potential future heat pump use. Rebalance emitters, avoid behind‑sofa locations, and insulate all accessible plumbing pipework, especially in suspended floors and lofts.
On the plumbing side, you’ll phase out any remaining steel or lead, upgrading to insulated copper or multilayer plastic, with pressure‑balanced mixers and a mains‑pressure hot water cylinder.
Electrically, you’ll rewire to current BS 7671 standards, add RCD/RCBO protection, extra sockets, dedicated cooker/EV circuits, and provision for solar integration.
Updating the Exterior and Kerb Appeal Sympathetically
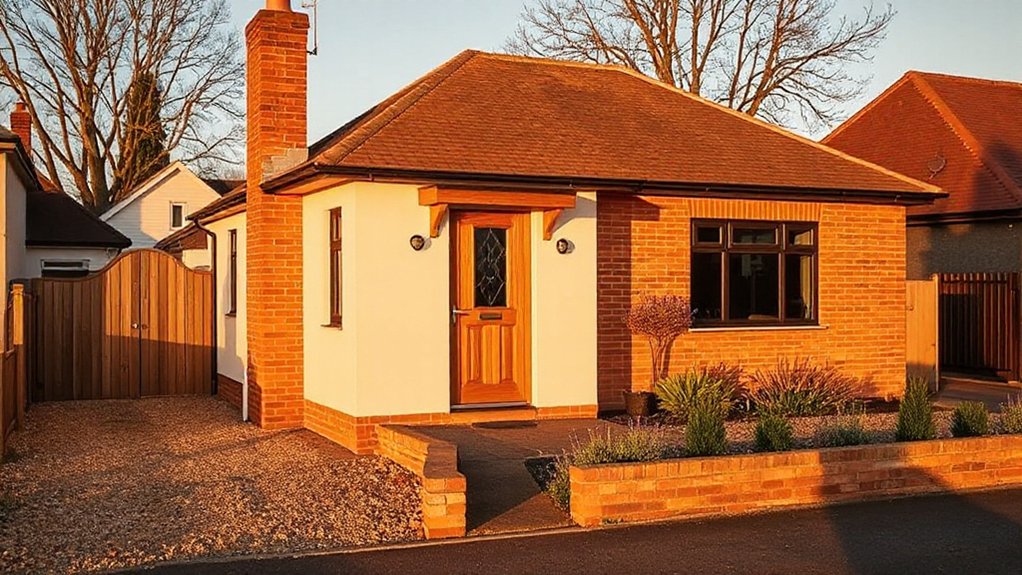
When you upgrade the exterior of a 1950s detached house in the UK, you need to respect its original proportions, roofline and fenestration while discreetly improving performance and aesthetics.
You’ll assess brickwork, render, cladding and paint colours so new materials, insulation upgrades and finishes work with the period character rather than against it.
At the same time, you should re-plan planting, driveways and front boundaries to enhance kerb appeal, comply with local planning guidance, and create a coherent streetscape presence.
Respecting Original Architectural Character
Although you’ll almost certainly be upgrading windows, doors, and finishes, a 1950s detached house in the UK reads best from the street when you treat its original proportions, roof form, and material palette as fixed reference points rather than problems to disguise.
You’re aiming for architectural preservation through careful editing, not reinvention, so start by recording existing conditions with photos, sketches, and measured elevations to guide historical accuracy.
Focus on retaining the house’s compositional logic: the vertical rhythm of openings, the eaves line, and chimney massing. Any new elements should sit within that established grid.
- Maintain original roof pitch, ridge height, and overhangs
- Align replacement openings with existing structural bays
- Preserve key 1950s features such as porches, canopies, and brick detailing
Updating Materials And Colour
As you refine the shell of a 1950s detached house, treat materials and colour as tools to sharpen its existing architecture rather than to overwrite it.
Start by auditing existing brickwork and render; in most UK settings, you’ll want vapour-permeable, insulated render systems that respect original cavity walls. Avoid fully cladding over brick – instead, clean, re‑point, and pair with limited areas of high‑pressure laminate, fibre‑cement, or timber for crisp contrast.
Choose colour palettes that reference the era’s Vintage charm without defaulting to pastiche: warm off‑whites, muted putty, and deep charcoal for soffits, fascias, and rainwater goods.
Specify factory‑finished aluminium windows in soft grey or off‑black, keeping frame thickness lean to align with mid‑century proportions while notably improving performance.
Landscaping And Front Boundaries
Instead of treating the house in isolation, read the front garden, driveway, and boundary treatments as a single composition that frames the 1950s facade and manages privacy, drainage, and parking. In UK settings, you’ll often work within Article 4 directions, sightline requirements, and SuDS guidance, so integrate permeable surfaces, low-level walls, and planting that softens hard edges.
Use garden design to reconcile car space with greenery: a 2.4–2.7m drive width, reinforced gravel or clay pavers, and a planted strip to capture run‑off.
Replace harsh boundary fencing on the street side with:
- Low brick plinth and painted timber or metal rails
- Native hedging for seasonal interest and habitat
- Setback fencing, visually screened by layered shrubs
Transforming Kitchens and Bathrooms for Modern Living

When you modernise a 1950s detached house in the UK, the kitchen and bathroom upgrades will usually drive the biggest gains in functionality, energy efficiency, and resale value.
Start by reviewing existing services: many 1950s homes have undersized circuits and ageing copper or even lead pipework. You’ll typically need a full rewire to current Part P standards and new plumbing with proper zoning and pressure balancing.
In the kitchen, specify high-efficiency appliances, induction hobs, and deep drawer storage, but pair them with Vintage fixtures and Retro aesthetics—think fluted glass, shaker fronts, and terrazzo-effect worktops.
In bathrooms, optimise layouts for 900mm shower enclosures, dual-flush WCs, and low-profile trays, adding mechanical extract to meet Part F while controlling condensation and mould risk.
Integrating Smart Home Tech Into a 1950s Detached House
Although 1950s detached houses weren’t designed with data cables and sensors in mind, you can integrate smart home technology cleanly by treating it as part of the electrical and fabric upgrade, not a bolt‑on gadget layer. When you rewire, specify deeper back boxes, neutral at every switch, and Cat6 runs to key locations. This lets you conceal hubs, maintain original features, and avoid surface trunking that fights the period character.
Prioritise systems that align with UK standards and Part L: zoned heating controls, integrated lighting scenes, and monitored security systems with discreet contact sensors and external cameras.
- Concealed Cat6 and Wi‑Fi access points for reliable backbone
- Hard‑wired, app‑linked security systems with UPS backup
- Voice control integrated with lighting, blinds, and AV
Budgeting, Phasing and Managing Your Modernisation Project
Because a 1950s detached house often needs structural, thermal, electrical and services upgrades at once, you’ll control costs and disruption far better if you treat the work as a phased, costed programme rather than a single “big bang” project.
Start budget planning by prioritising essential compliance items: structure, Part L thermal performance, wiring to current IET standards, and drainage. Then layer in layout changes, glazing upgrades and interior finishes.
Phase intrusive works (steel insertion, rewiring, MVHR ducting) together to avoid repeated opening of floors and walls.
In the UK, align cash flow with stage payments, contingency (10–15%), and any VAT or grant implications.
For contractor selection, insist on fixed-price, fully scoped JCT contracts, references for period refurbishments, and clear responsibility for coordination with Building Control.
Frequently Asked Questions
How Can I Live in the House Safely While Major Works Are Underway?
You prioritise phased zones, isolate dusty areas, and maintain clear escape routes. You establish temporary living arrangements away from structural works, enforce contractor safety precautions, use UK-compliant RCD protection, and specify sealed barriers, negative-pressure extraction, and daily site clean-downs.
What Planning Permission Quirks Affect 1950S Houses Compared With Newer Properties?
You’ll face stricter Heritage restrictions and tighter Architectural guidelines: original façades, rooflines, and window proportions matter more than in newer estates, so you’ll coordinate early with your local conservation officer to avoid costly redesign shocks.
How Do I Choose Professionals Experienced Specifically With Mid‑Century Modernisation Projects?
You shortlist RIBA-chartered architects and Retrofit Coordinators who showcase mid‑century case studies, emphasise Historical accuracy, and prove Design integration with SAP/Part L compliance, local conservation guidance, and regional supply chains for period-appropriate materials, glazing, services, and landscaping.
What Insurance Adjustments Are Needed During and After the Renovation Process?
You notify your insurer before works begin—renovations cause about 25% of UK home claims—then extend insurance coverage to include renovation and public liability, confirm contractor indemnity, and, post‑works, update rebuild value, fixtures, and security‑driven policy adjustments.
How Can Modernisation Affect Resale Value in Different Local Markets?
You’ll see resale value vary by region: in high-demand markets, alignment with market trends can outperform renovation costs; in softer areas, over-specification erodes ROI, so calibrate upgrades to local buyer profiles and planning constraints.
Conclusion
You’re not just modernising a 1950s detached house; you’re tuning a classic. You upgrade U‑values, but protect Flemish‑bond brickwork. You open up the plan, but keep the stair hall’s proportions. You swap single glazing for slimline heritage units, but retain Crittall sightlines. By phasing works, coordinating trades, and respecting UK Building Regulations, you create a home that’s warmer, smarter, and more efficient—yet still reads, unequivocally, as a well‑loved mid‑century British original.