


When you update a Tudor-style cottage, you’re balancing structural integrity, historic character, and modern performance. You’ll assess the bones first—timbers, masonry, roof—and map how mechanicals, insulation, and layout changes can fit without compromising original proportions. Every decision, from leaded glass repair to discreet smart systems, must respect scale, patina, and sightlines. The challenge is knowing which elements to preserve exactly, which to reinterpret, and which to quietly upgrade next…
Key Takeaways
- Preserve defining Tudor elements—half-timbering, steep gables, leaded glass, and brickwork—using like-for-like repairs and craftsmen familiar with traditional materials.
- Modernize interiors with warm neutral palettes, lighter textiles, and discreet LED lighting to improve brightness without erasing historic character.
- Upgrade kitchens and baths using simple, durable finishes, restrained metals, and concealed storage that respect original proportions and window placements.
- Integrate smart technology as invisible infrastructure—hidden wiring, sensors, and controls—concentrated on secondary elevations and interior spaces.
- Plan renovations in a preservation-first sequence: address structure and envelope, then systems, then finishes, budgeting contingencies for hidden masonry and timber issues.
Start With Your Tudor Cottage’s Bones and Layout
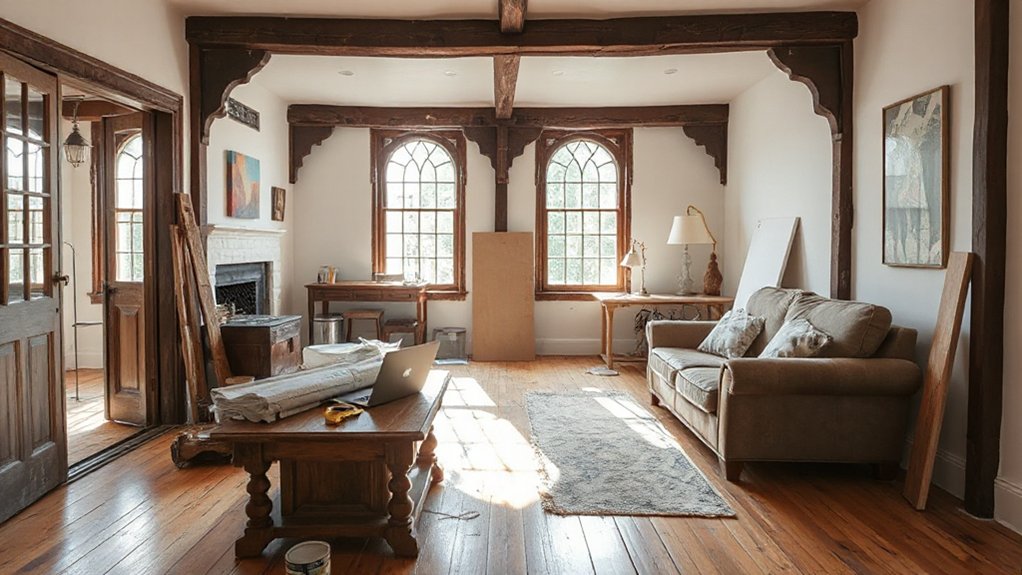
Before you touch finishes or furnishings, assess your Tudor cottage’s underlying structure and plan—its bones and layout—because these determine what you can safely and elegantly change. Start with a measured survey, noting wall thicknesses, chimney masses, and beam locations. You’re reading structural integrity first, aesthetics second.
Map original circulation paths, then compare them to how you live now. Where doorways choke movement or rooms feel chopped up, consider selective openings, always verifying load paths before altering studs or masonry. Aim to rationalize the plan without erasing quirky asymmetries that support historical accuracy.
Coordinate your engineer and designer early so structural upgrades—sistered joists, hidden steel, foundation work—quietly enable modern comfort while preserving the cottage’s legible, character-rich framework.
Lighten Up Dark Tudor Interiors Without Losing Warmth
Although Tudor cottages evolved for a climate of low light and high draughts, you can recalibrate that enveloping darkness without stripping out the style’s warmth or depth. Start by analysing light pathways: increase reflectance, not glare. Choose complex, warm neutrals—mushroom, stone, putty—that register differently across plaster, beam, and brick.
To maintain historical accuracy, keep beams visibly darker than adjacent surfaces, but soften contrast with low-sheen finishes. Replace heavy, light-absorbing textiles with finely lined wools and linens in tighter colour ranges, preserving acoustic softness.
Address restoration challenges methodically: retrofitting discreet LED uplighting on beams, adding picture lights to highlight leaded glass, and specifying low-profile wall lights where ceilings drop. You’ll brighten perception while respecting the cottage’s tactile, time-worn envelope.
Update a Tudor-Style Cottage Exterior the Right Way
When you update a Tudor-style cottage exterior, you have to balance respect for original half-timbering, steep gables, and leaded windows with a sharper, more contemporary expression.
Start by identifying which architectural details are structurally and historically significant, then let those elements dictate how far you can push change.
From there, you can modernize colors and materials—such as trim finishes, masonry tones, and roofing—so they harmonize with the existing proportions rather than compete with them.
Respecting Original Architectural Details
Even as you modernize a Tudor-style cottage, the exterior only succeeds if its original architectural logic remains legible. You’re practicing Historical restoration and Architectural preservation, not re-invention, so start by documenting what’s there: proportions, alignments, and joinery. Photograph every elevation, then map key elements on scaled drawings.
Prioritize continuity where the eye reads the façade first:
- Original half-timbering patterns, spacing, and connection details
- Window groupings, mullion dimensions, and leaded or divided-light configurations
- Chimney massing, roof pitch, and gable hierarchy
When you repair, use like-for-like profiles and dimensions, even if substrates update behind the scenes. Preserve shadow lines at bargeboards, fascias, and sills; they’re as critical as materials.
Every intervention should clarify the cottage’s structure, not mask or simplify it.
Modernizing Colors And Materials
You’ve documented the structure and honored the original details; now the palette and materials have to bring that framework into the present without breaking its logic.
Start by tightening the exterior color palette to three tones: a grounded field color, a deeper trim, and an accent reserved for the door or metalwork.
Treat material selection as a performance problem, not just aesthetics. Replace failing timber with rot-resistant, dimensionally stable products that can hold crisp profiles. Use high-quality fiber-cement or lime-based renders that breathe yet resist moisture.
When introducing metal, choose matte or patinated finishes over mirror-like stainless. Calibrate sheen levels—eggshell for walls, satin for trim—to keep surfaces visually quiet, allowing the Tudor massing and proportions to remain legible.
Modernize Kitchens and Baths in a Tudor-Style Cottage
Although Tudor cottages are defined by their historic character, the most successful updates treat kitchens and baths as high-performance spaces discreetly nested within that story. You prioritize function first: efficient work triangles, ergonomic clearances, and durable, low-maintenance finishes that echo original materials without mimicking them.
Align window placement with garden landscaping views and calibrate interior lighting so prep zones, vanity areas, and showers receive layered, dimmable illumination.
Use a restrained palette of metals and surfaces, then repeat them to create continuity between rooms. Emphasize:
- Flush-integrated storage that hides visual clutter
- Robust ventilation strategies to protect historic fabric
- Simple geometric tile layouts that complement Tudor proportions
Blend Old-World Details With Modern Comfort and Tech
To blend Tudor character with 21st-century living, you’ll treat smart tech, comfort, and efficiency as invisible layers behind period detailing.
You’ll pair vintage charm—leaded glass, timber beams, iron hardware—with comfort-driven layout updates that support contemporary circulation, zoning, and furniture planning.
At the same time, you’ll specify discreet energy-efficient upgrades and integrated systems so performance improves while the cottage’s historic presence remains visually dominant.
Smart Tech, Vintage Charm
While a Tudor cottage celebrates steep gables, leaded glass, and timbering, its interior can quietly integrate high-performance systems that make daily life smoother and more efficient. You start by treating technology as infrastructure, not décor. Run low-voltage wiring in concealed chases, specify in-wall access points, and centralize controls in a discreet, ventilated closet.
Preserve mood with dimmable antique lighting connected to smart switches that match your bronze or bakelite plates. Let sensors manage comfort and security while you keep sightlines focused on plaster, beams, and vintage furniture.
Use smart devices where they visually disappear:
- In-ceiling speakers aligned with joists
- Motorized shades hidden in header pockets
- Ultra-thin TVs recessed into paneling with frame-style bezels
Comfort-Driven Layout Updates
You’ve hidden the tech; now the way rooms flow has to support how you actually live. Start by mapping circulation: identify bottlenecks around the entry, stair, and kitchen, then widen passages or realign openings while preserving original casings and beams.
Reorient seating to frame the fireplace and key windows, not the screen you’ve concealed.
Treat the cottage and grounds as one system. Align doorways with garden landscaping views so daily paths terminate in greenery and light, softening the Tudor massing.
Calibrate interior lighting in layers: low-level sconces to respect plaster walls, concealed tracks in beams for task zones, and warm-temperature lamps that echo leaded-glass glow.
Every adjustment should prioritize ergonomic comfort while amplifying the home’s historic geometry.
Discreet Energy-Efficient Upgrades
Although the cottage’s charm lies in its apparent simplicity, its envelope and systems can quietly perform at a very high level. You treat the shell as infrastructure: concealed insulation upgrades in rafter bays, cavity walls, and beneath new lime-plaster finishes radically cut heat loss while preserving historic proportions and profiles.
You integrate technology where it disappears. Roof-mounted solar panels align with rafter spacing and sightlines, set back from gables so the street view remains authentically Tudor. Inside, smart controls tuck into existing niches and paneling.
Use a performance-led sequence:
- Tighten the envelope before resizing mechanical systems.
- Prioritize low-visual-impact measures at primary façades.
- Reserve visibly modern elements for secondary elevations and garden-facing roofs.
Plan Budgets, Timelines, and Pros for Tudor Updates
Before you start opening walls or ordering custom windows, anchor your Tudor update in a clear plan that aligns budget, schedule, and the right professionals. Define scope in tiers: structural corrections, envelope and systems, then finishes and Landscaping ideas that frame the façade. Assign contingency—10–20%—for hidden conditions inside plaster, masonry, and roofing.
Sequence work to protect historical preservation goals. Prioritize repairs to half-timbering, leaded glass, and brickwork before interior upgrades; otherwise, you’ll risk rework and water damage.
Build a timeline with dependencies: permitting, custom millwork lead times, and seasonal constraints for exterior stains and mortar.
Select pros with verifiable Tudor portfolios: preservation architects, structural engineers, and contractors fluent in lime mortar, wood windows, and steep-gable detailing.
Frequently Asked Questions
How Can I Make a Small Tudor Cottage Feel Larger Without Major Additions?
You enlarge it visually: open sightlines, expose beams selectively, use light paint, maximize Interior lighting with layered fixtures, add mirrors, streamline built-ins, and extend perception outdoors through coherent Landscape design, framed views, low plantings, and defined terraces.
What Eco-Friendly Materials Work Best With Traditional Tudor Aesthetics?
You’ll pair reclaimed oak, lime plaster, and clay brick like instruments in tune, then specify sheep’s wool sustainable insulation, mineral-based eco friendly paints, and FSC-certified timber, ensuring vapor permeability, low VOCs, and historically coherent detailing.
How Do I Preserve Original Leaded Glass Windows While Improving Energy Efficiency?
You preserve leaded glass and Historical accuracy by restoring cames, adding interior low‑iron secondary glazing, and upgrading weatherstripping. You don’t replace sashes; instead, you specify warm‑edge spacers, reversible seals, and vented cavities to prevent condensation.
Are There Zoning or Historic-District Issues Unique to Tudor-Style Renovations?
You’ll navigate a legal maze where Historic preservation and zoning regulations intertwine; Tudor renovations often face stricter façade controls, window and roof profile limits, setback constraints, and material approvals, so you must verify design guidelines and commission review procedures early.
How Can I Increase Resale Value Without Over-Modernizing My Tudor Cottage?
You increase resale value by prioritizing period-sensitive landscaping upgrades, restoring windows and trim, and updating systems invisibly. Inside, refine interior decor with classic profiles, warm neutrals, and high-spec fixtures that echo original proportions while discreetly integrating modern lighting and storage.
Conclusion
When you respect your Tudor cottage’s bones, every upgrade feels intentional, not invasive. Imagine phasing your work like Elena did with her 1930s Tudor: first stabilizing masonry and leaded glass, then adding interior insulation, concealed mini-splits, and layered lighting that warmed, rather than washed out, the oak trim. Use her approach—prioritize structure, plan discreet tech, and prototype finishes—to modernize performance and comfort while keeping that unmistakable Tudor character intact.