
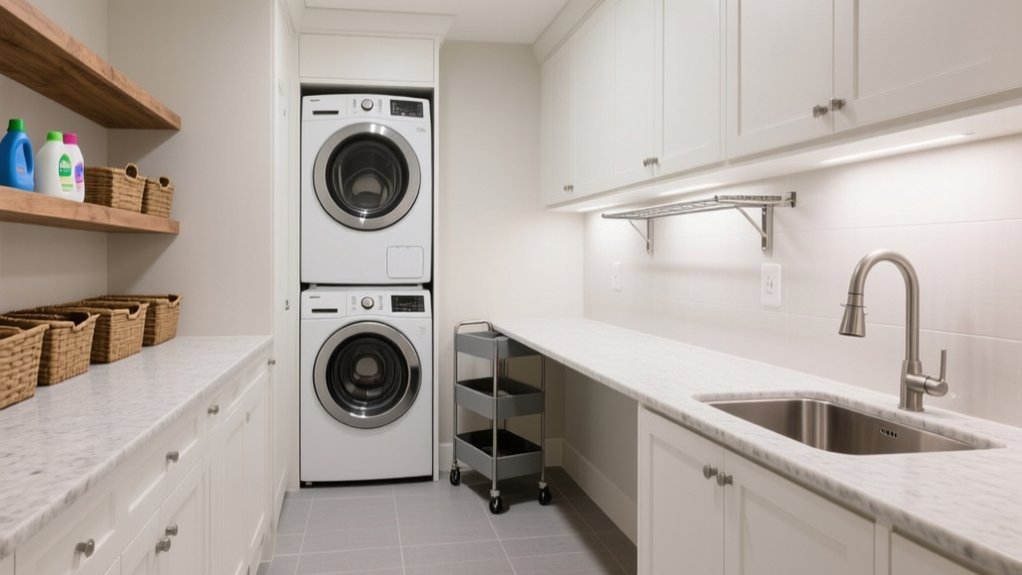

Maximise efficiency by mapping your laundry flow—drop, sort, treat, wash, dry, fold, store—then arrange zones in that order to cut steps. Put the washer near the entry for hamper drop-off, set the dryer right beside it, and keep a “landing strip” counter for baskets and stain removers. Use a continuous worktop for sorting and folding, add bright task lighting, and go wall-to-ceiling with adjustable, labeled storage. Next, you’ll see layout options and common mistakes to avoid.
Key Takeaways
- Map the laundry workflow end-to-end, then group zones by task (drop, sort, treat, wash, dry, fold, store) to reduce steps.
- Choose a layout that fits the room: single-wall for narrow, galley with 900mm clearance, or L/U-shape to maximize counters and movement.
- Place washer near the entry for hamper drop-off, position the dryer beside it, and align doors to improve loading and staging efficiency.
- Maximize vertical storage with wall-to-ceiling cabinets, adjustable shelves, overhead racks, and tall broom cupboards; keep daily items at eye level.
- Add a continuous folding counter, good task lighting, and space-saving fixtures like pocket doors, pull-out hampers, and fold-away drying or ironing solutions.
Map Your Utility Room Workflow First
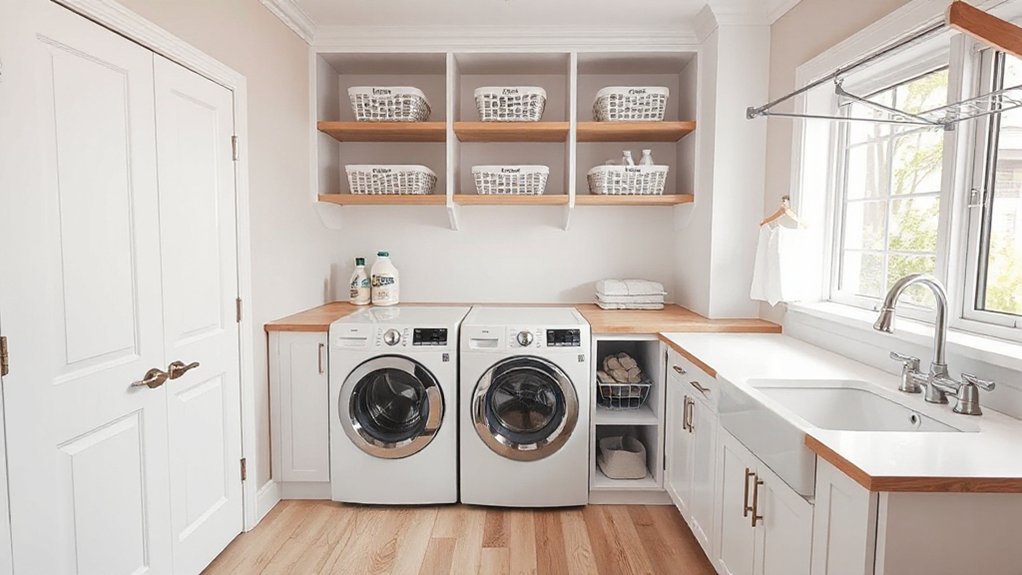
Before you buy cabinets or shuffle appliances, map out how you actually use the room from start to finish. Trace each task: drop dirty clothes, sort, pre-treat, wash, dry, fold, store, and exit. Put frequently used items within arm’s reach and rarely used supplies up high. Measure clearance for door swings, pull-out hampers, and detergent drawers so nothing blocks movement. Group zones by workflow, not by product type, and keep a “landing strip” counter for baskets and stain removers. Use color coordination on bins and labels so you grab the right supplies fast and restock at a glance. Plan Appliance maintenance access: leave space for filter changes, hoses, vents, and drip trays.
Pick the Best Utility Room Layout Shape
Where should the washer, dryer, sink, and storage go so you’re not zigzagging around baskets? Start by matching the layout’s best shape to your Room dimensions. In a narrow room, choose a single-wall run so doors and drawers clear the walkway; stack appliances or place them side-by-side under a continuous worktop. In a medium-width room, a galley (two parallel runs) keeps everything within arm’s reach; leave at least 900mm between runs for easy loading. If you’ve got an L-shaped corner, wrap cabinets to gain counter space without blocking circulation. For larger rooms, a U-shape maximises surface area, but keep the opening wide enough to carry hampers through comfortably.
Set Up Utility Room Zones to Save Steps
How many extra steps do you take just to move a load from hamper to hanger? Cut them by zoning your utility room into clear task stations: drop, sort, treat, fold, and store. Place a slim pull-out hamper bay at the entry, then add labeled bins or wall hooks for lights, darks, delicates, and “needs repair.” Reserve one continuous counter for folding and quick staging; mount a rail or retractable line above it for drip-dry items. Keep detergents, stain sticks, and cloths in a caddy that lives where you pre-treat, not scattered across shelves. Use Laundry room decor that doubles as function—pegboards, baskets, and tags. Upgrade Utility room lighting over each zone so you spot stains fast.
Place Washer, Dryer, and Sink Efficiently

Once you’ve mapped your laundry zones, lock in the big three—washer, dryer, and sink—so each station works without backtracking or bottlenecks. Start with appliance placement: keep the washer closest to the entry where hampers arrive, and put the dryer immediately beside it to minimise dripping and transfers. If you’re stacking, align doors for a clear swing and leave ventilation gaps as specified. Set the sink within arm’s reach of the washer for quick pre-treating, but not in the splash line of open machine doors. Smart Sink positioning means placing taps on the side that keeps hoses, valves, and electrics dry. Maintain a straight service wall where possible, and give yourself a clear standing lane in front for loading and unloading safely.
Add a Worktop for Sorting and Folding
After you’ve set the washer, dryer, and sink, add a continuous worktop so you can sort and fold without stealing floor space. Run it wall-to-wall over appliances or beside the basin to create a clear landing zone for clean and dirty loads.
Size the depth to match your machines, and keep the height comfortable for folding—around standard counter height works for most people. Choose a durable, wipe-clean surface that won’t mind detergent drips or damp towels. Turn one end into a Sorting station by leaving a clear square for baskets and stacks, and keep the middle as your Folding station for shirts, linens, and school uniforms. Add a small pull-out rail under the worktop for hangers so folded items move out fast.
Use Vertical Utility Room Storage (Wall to Ceiling)
You’ll reclaim valuable floor space when you take storage all the way up with wall-to-ceiling cabinetry that hides clutter and keeps supplies contained. Add adjustable shelf systems so you can shift heights as bottles, baskets, and tools change, and label zones for quick grab-and-go access. Finish with overhead rack storage for bulky or seasonal items, keeping frequently used essentials at eye level and the rest safely above.
Wall-To-Ceiling Cabinetry
Even if your utility room feels tight, wall-to-ceiling cabinetry lets you reclaim vertical space and keep the floor clear. Start with wall mounted cabinets above appliances and worktops so detergents, cloths, and small tools stay within reach but off the counter. Push upper units to the crown for true ceiling height storage, and reserve those highest shelves for bulk paper goods, seasonal items, and rarely used spares. Use tall pantry-style doors to hide brooms, mops, and ironing boards in one slim run. Add pull-out bins behind a base door for recycling, and include a narrow vertical cabinet for vacuum attachments. Finish with labeled containers and consistent depths so everything stacks neatly and you avoid wasted voids.
Adjustable Shelf Systems
One adjustable shelf system can turn a blank wall into wall-to-ceiling utility storage that changes with your needs. Start by mapping what you store most: detergents, paper goods, tool boxes, pet supplies, or bins. Install vertical rails into studs, then add adjustable shelving so you can move shelf heights as seasons and routines shift. Keep heavy items between knee and chest height for safer lifting, and place lighter backups up high. Use labeled clear totes for quick scans, and add wire baskets for rags or dryer sheets. Build modular storage zones: a narrow bay for brooms, a deeper bay for hampers, and a small shelf run for chargers and manuals. Leave a few inches of growth space.
Overhead Rack Storage
Where can bulky, rarely used items go when every shelf and cabinet is already spoken for? Look up. An overhead rack lets you claim the dead zone between wall and ceiling for seasonal bins, spare paper goods, and backup cleaning supplies without shrinking your floor path. Mount it above the door, washer-dryer run, or a clear wall section, keeping 7 feet of head clearance and your light fixtures unobstructed. Anchor brackets into studs, use toggle bolts only where rated, and follow the rack’s load limit. Standardize bins, label the short side, and load by weight: light items center, heavier near supports. Add a step stool hook nearby so access stays safe. That’s Storage optimization you’ll actually maintain.
Utility Room Layout Ideas for Small Spaces
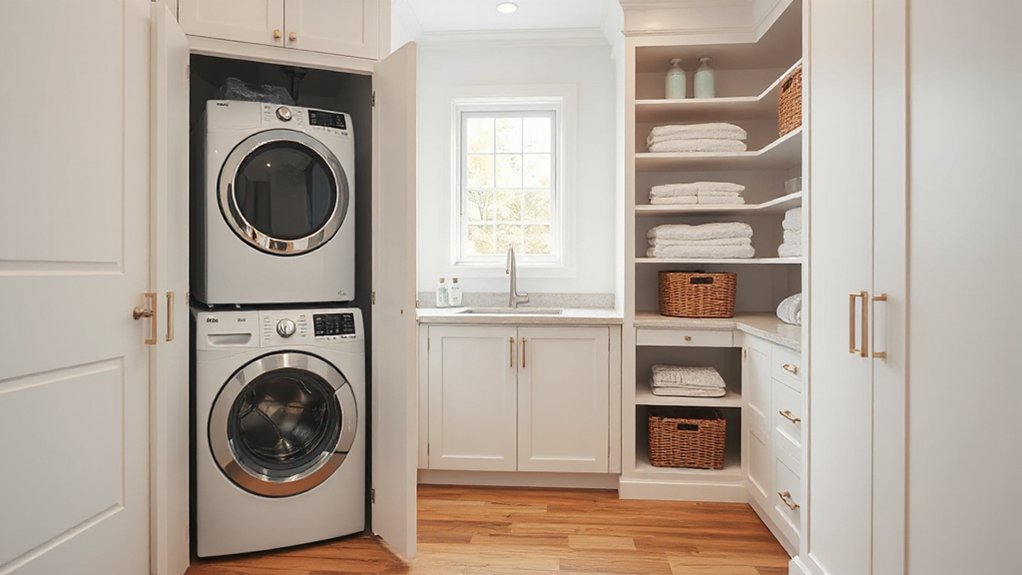
How do you fit laundry, cleaning supplies, and daily drop-zone clutter into a room that barely qualifies as a closet? Start with appliance placement: stack the washer and dryer, or slide a ventless combo under a counter to free floor space. Keep a 600mm-wide clear path, then run shallow cabinets (250–300mm) on the opposite wall for detergents and tools. Add a pull-out hamper and a narrow tall broom cupboard to stop loose items from spreading. Use a wall-mounted fold-down drying rack above the sink line, and hang frequently used bottles on a rail with clips. For lighting design, install bright, even LED strips under shelves plus a motion sensor, so you don’t waste time hunting in shadows.
Utility Room Layout Mistakes That Waste Space
Even if your utility room has decent square footage, a few layout slip-ups can shrink it fast. You lose space when you park appliances in the middle, forcing wide walkways you don’t need. Push machines tight to walls, and stack where safe to free floor area.
Cluttered countertops waste the surfaces meant for folding and sorting, so add wall rails, baskets, and a slim shelf above the worktop to lift detergents and tools. Skipping vertical storage is another killer: run cabinets to the ceiling and use door backs for hooks. Poor lighting makes you spread items out to see, so install bright overhead LEDs and under-cabinet strips. Finally, avoid doors that swing into the room; swap to pocket or bi-fold options.
Frequently Asked Questions
What Are the Best Flooring Materials for a Utility Room?
Choose porcelain tile, luxury vinyl plank, or sealed concrete; they’re waterproof, durable, and easy to clean. You’ll support storage solutions and space optimization by picking low-profile, slip-resistant surfaces that handle mud, detergents, and heavy appliances.
How Can I Soundproof a Utility Room With Noisy Appliances?
You can soundproof a utility room by sealing gaps, adding door sweeps, and mounting appliances on anti-vibration pads. Use soundproofing techniques like acoustic panels, and noise reduction materials like mass-loaded vinyl behind cabinets.
What Ventilation Is Needed to Prevent Damp and Mould Buildup?
You’ll need continuous Air circulation and strong Humidity control: fit a humidistat extractor vented outdoors, add a trickle vent or grille for make-up air, keep doors undercut, and run appliances’ dryer vents outside.
Which Lighting Types Work Best for Sorting and Stain Treatment?
For sorting and stain treatment, you’ll want bright task lighting over your counter, paired with even ambient lighting overhead—sharp focus beside soft fill. Use high-CRI LEDs, 4000–5000K, under-cabinet strips, and glare-free diffusers.
How Much Does a Typical Utility Room Remodel Cost?
You’ll typically spend $5,000–$15,000 for a utility room remodel, or $20,000+ with plumbing and custom cabinetry. Control costs by prioritizing storage organization, efficient appliance placement, durable finishes, and reusing existing hookups.
Conclusion
When you plan your utility room like a mini workflow, you’ll save time and floor space every day. Keep washing, drying, and folding in one line, add a slim worktop for sorting, and take storage to the ceiling so nothing crowds the path. For example, in a 5×7 ft laundry nook, you can stack the washer/dryer, place a sink beside them, and fit pull-out hampers under a 18-inch-deep counter.