


When you rush into painting a spare bedroom and, a week later, find peeling patches and paint on the skirting boards, the problem usually starts long before the first coat. Proper preparation means you clear and protect the room, clean and repair the surfaces, and control dust and ventilation. If you skip or rush any of these stages, the finish will fail early, so you need a clear, step-by-step approach first.
Key Takeaways
- Clear the room of furniture and soft furnishings, then cover remaining items and floors thoroughly with taped-down dust sheets or plastic.
- Clean walls, trim, and high-contact areas to remove dust, grease, and contaminants, then allow all surfaces to dry fully.
- Repair imperfections by filling cracks, holes, and damaged plaster, then sand smooth and remove all sanding dust.
- Mask edges, fixtures, and fittings with low-tack decorator’s tape, ensuring firm adhesion to prevent paint bleed.
- Apply appropriate primer and stain-blocker where needed, let it dry, then inspect and lightly sand any nibs or runs before painting.
Clear the Room and Protect Your Furniture

Before you even open a tin of paint, strip the room back as far as possible by removing furniture, soft furnishings, pictures, and ornaments, then unplugging and moving electrical items out of the way.
Rationalise the furniture arrangement so only large, immovable items remain; pull these into the centre of the room, allowing you clear access to all walls, skirting boards, and radiators.
Cover remaining furniture with polythene dust sheets, taping them securely at the base so overspray and dust can’t creep underneath.
Remove curtains, blinds, and other window coverings completely; don’t just tie them back, as they’ll trap dust and risk paint transfer.
Protect window boards and door linings with sheet plastic or decorator’s paper, ensuring all exposed surfaces are fully shielded.
Gather the Right Painting and Prep Supplies
Once the room’s cleared and protected, assemble every tool and material you’ll need so you’re not stopping mid‑job. Decide your colour selection and paint finish first so you can match primers, rollers, and brushes to the product data sheet.
Lay out trade‑quality synthetic brushes, roller frames, extension poles, and appropriate roller sleeves (short pile for smooth plaster, medium for lightly textured walls). Have a paint kettle, paint scuttle, and roller tray ready for decanting and cutting‑in.
Stock up on decorator’s masking tape, dust sheets, filler knives, a caulking gun, and a sturdy step‑ladder. Keep a stirrer, paint opener, and bin bags close by. Properly chosen supplies ensure consistent coverage, sharp lines, and an efficient, uninterrupted painting process.
Clean Walls and Trim for Better Paint Adhesion
Before you open a tin of paint, you must remove all dust, dirt and grease so the new coating bonds properly and doesn’t peel. You’ll use appropriate cleaning products and tools for different contaminants, from sugar soap and degreaser to microfibre cloths and abrasive pads.
Dust, Dirt, And Grease Removal
Although it’s tempting to start painting as soon as the room is masked up, you’ll only get a durable, even finish if the surfaces are completely free from dust, dirt and grease. Effective dust removal comes first: work from ceiling to skirting, dislodging cobwebs and loose particles so they don’t migrate into fresh paint and cause nibs or rough patches.
Next, tackle ingrained grime. Focus on high-contact areas such as around light switches, door frames, radiators and cooker hoods, where fingerprints and vapour leave a film.
Thorough grease cleaning is crucial in kitchens and near fireplaces; even a slight residue will prevent proper adhesion and can lead to flaking. Rinse residues thoroughly and allow all surfaces to dry before you move on.
Cleaning Products And Tools
To clean walls and trim effectively for better paint adhesion, you’ll need the right combination of products and tools rather than just warm water and guesswork. Use a mild sugar soap solution or eco-friendly cleaners designed for pre-paint preparation; avoid anything oily or heavily fragranced. Decant into a trigger spray bottle for controlled application.
Equip yourself with two buckets (wash and rinse), microfibre cloths, a non-scratch scouring pad, and a stiff-bristled brush for skirting boards and corners. A small detail brush helps around sockets and architraves.
For gloss or previously painted trim, use a dedicated degreaser and then lightly abrade with fine sanding pads, vacuuming dust with a brush attachment.
Before paint sampling, ensure surfaces are fully dry and residue-free to prevent adhesion failure.
Repair Holes, Cracks, and Other Wall Imperfections
Once your surfaces are clean, you’ll need to identify and assess common wall defects such as nail pops, hairline cracks, settlement cracks, gouges, and blown plaster.
You’ll then select the correct filler or patching compound and apply it using proper technique so the repair bonds well and sits flush with the surrounding surface.
Identifying Common Wall Damage
Before you open a tin of paint, methodically inspect every wall surface so you can spot and address defects that would otherwise telegraph through the finished coat. Work under good lighting, using a torch held at a shallow angle to highlight irregularities.
Look for hairline cracks, settlement cracks around door frames, and stepped cracks in plaster or masonry that may indicate structural issues rather than simple cosmetic damage. Note blown plaster (hollow-sounding areas), flaking or crazed paint, and previous poor repairs that sit proud of the wall.
Identify nail pops, rawlplug holes, picture hook holes, and gouges from furniture. Check for damp: tide marks, blistering paint, salt deposits, or black mould. Mark every defect lightly in pencil so you can treat each area systematically later.
Proper Patching Techniques
Although it’s tempting to rely on filler alone, proper patching starts with stabilising the defect so your repairs don’t fail under the new paint. First, rake out loose material with a scraper, then dust off thoroughly.
For hairline cracks, widen slightly with a knife so filler can key in. For larger holes, undercut edges and, on plasterboard, fit a patch or backing mesh.
Use a high‑quality ready‑mixed filler or powder filler mixed to a smooth, lump‑free consistency. Apply in thin layers, allowing each to dry fully.
Sand back with fine abrasive, using a flat sanding block for accurate texture smoothing that matches surrounding surfaces.
Finally, spot‑prime patched areas so subsequent paint mixing and application produce an even, consistent finish.
Sand Surfaces Smooth and Remove Glossy Finishes
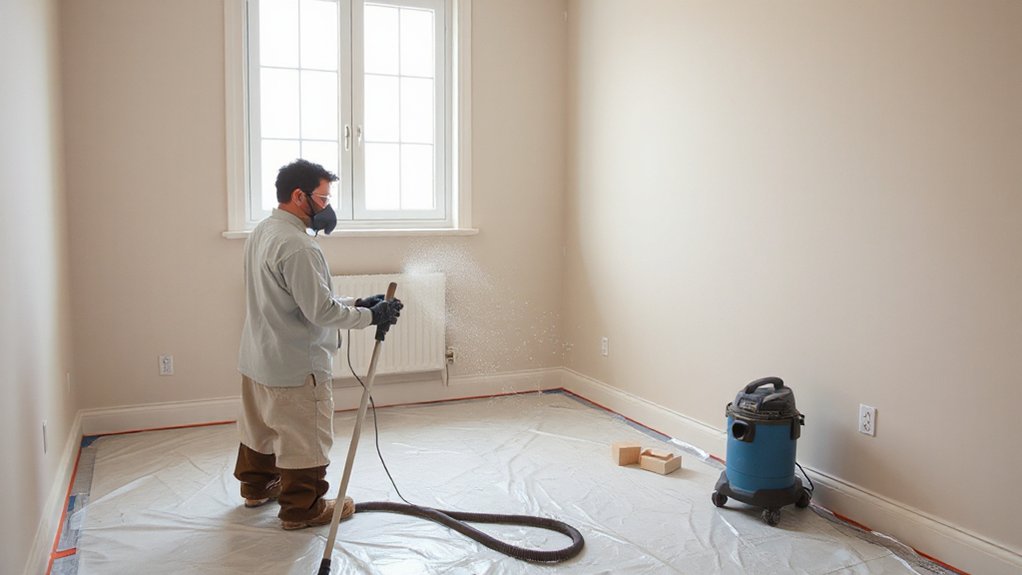
Whether you’re dealing with old paint or new plaster, sanding is essential to create a smooth, keyed surface that fresh paint can adhere to properly. Start by inspecting the surface texture under good lighting, identifying drips, nibs, and any glossy finish that could cause poor adhesion.
Use a fine- to medium-grade abrasive (120–180 grit) on walls and ceilings, and slightly coarser paper on previously painted woodwork. Sand in smooth, overlapping strokes, following the substrate’s contours.
For a heavy glossy finish, lightly de-gloss with 120 grit, then refine with 180 grit to avoid visible scratch marks.
Vacuum the dust and wipe down with a damp, lint-free cloth. Allow to dry fully so your primer and topcoats bond reliably.
Tape Off Edges, Fixtures, and Areas You Won’t Paint
With the surfaces sanded and dust-free, you’re ready to protect anything that shouldn’t receive paint. Use low-tack decorator’s tape for precise edge masking along skirting boards, architraves, window frames, sockets, and switches. Press the tape down firmly with a clean fingertip or plastic scraper to prevent bleed-through, especially on slightly textured walls.
Apply fixture protection before you open a tin of paint. Remove what you can; where that’s not practical, mask it thoroughly.
- Tape around door furniture, wall lights, and radiators, wrapping vulnerable areas in cling film for extra coverage.
- Run tape along carpet edges, tucking it just under the gripper using a filling knife.
- Mask off built-in wardrobes, shelves, and any exposed appliance fronts.
Decide When and Where to Use Primer Before Painting
Before you crack open the paint, decide if the surface needs a primer and which type is appropriate. Use primer on bare plaster, new timber, stained areas, patched sections, and any glossy or previously oil-based coatings. It improves adhesion, evens porosity, and stops staining or tannin bleed-through.
Base your primer selection on the substrate and condition. Choose a plaster sealer or mist coat for fresh skim, wood primer or stain-blocking primer for timber, and adhesion primer for tiles, melamine, or existing gloss. For nicotine, damp, or marker stains, use a dedicated stain-blocking product.
Apply sound priming techniques: cut in edges with a brush, then roll evenly, maintaining a wet edge. Don’t overload; aim for uniform coverage and recommended drying times.
Do a Final Prep Check Before You Open the Paint
Once the primer’s fully dry, run a final check so the finish coat goes on cleanly and without surprises. Walk the room methodically, starting at the ceiling and working down to the skirting boards, correcting anything that’ll telegraph through. Confirm your paint colour selection against the primed surface and existing lighting; this is your last chance to adjust shade or sheen.
- Inspect every wall under good lighting for nibs, runs, or filler ridges; lightly de-nib with fine abrasive paper and remove dust.
- Confirm masking tape is firmly adhered, sockets are loosened or removed safely, and floors are fully protected.
- Review ventilation considerations: test window operation, position a fan if needed, and plan safe breaks to avoid solvent build-up.
Frequently Asked Questions
Can I Sleep in a Freshly Painted Room the Same Day?
You generally shouldn’t sleep in a freshly painted room the same day. Allow full ventilation, remove dust from Surface cleaning, guarantee Furniture protection coverings are removed, and wait until odour dissipates and paint is fully touch-dry, preferably overnight.
How Do I Safely Deal With Lead-Based Paint When Prepping?
You manage lead paint removal by avoiding sanding, using wet-scraping methods, sealing off the area, wearing suitable protective gear (FFP3 mask, goggles, gloves, disposable overalls), bagging debris double-layered, and following UK HSE guidance or employing licensed contractors.
What Temperature and Humidity Are Best for Interior Painting Prep?
You should aim for 10–25°C paint temperature and 40–60% humidity levels. As they say, “fail to prepare, prepare to fail”: stabilise conditions, ventilate gently, avoid sudden drafts, and let substrates fully dry before applying coatings.
How Far in Advance Should I Schedule Prep Before Professional Painters Arrive?
Schedule prep 2–3 days before painters arrive. You’ll declutter, protect furnishings, complete surface cleaning, and assemble painting tools. For major repairs or drying plaster, allow 5–7 days so substrates stabilise and decorators can start immediately.
How Do I Minimize Paint Fumes and Odors During and After Painting Prep?
Open windows opposite each other; use fans to create cross‑breeze ventilation strategies. Choose low‑VOC products. Deploy bowls of bicarbonate of soda and activated charcoal as odour absorption techniques. Remove soft furnishings; bag dust sheets promptly; ventilate for several days.
Conclusion
You’ve turned a cluttered cave into a well‑kept workshop, each sheet, brush and strip of tape a tool in your armoury. By cleaning, repairing and sanding, you’ve laid foundations like a skilled bricklayer, ensuring the paint won’t betray you later. With edges masked and primer chosen wisely, the walls now wait like fresh parchment. When you finally lift the roller, you’re not guessing—you’re commanding the room’s next chapter.