


You can upgrade your staircase quickly by picking jobs that match your budget, downtime and DIY skill. Start by fixing squeaks, loose nosings and worn varnish, then paint with tough floor enamel/polyurethane or stain and seal with two coats of varnish. For a modern look, swap balusters and check Part K spacing (aim under 100mm) and handrail height (900–1000mm). Add a gripped runner and LED step lighting with sensors for safer use. Keep going to see the best options for your layout.
Key Takeaways
- Prioritise upgrades by budget, downtime, and DIY skill, starting with quick wins like paint, stain, or carpeted treads.
- Fix squeaks, loose nosings, and worn finishes before redecorating to improve safety and ensure a longer-lasting result.
- Modernise the look by replacing balusters or the handrail, keeping UK spacing under 100mm and rail height about 900–1000mm.
- Add a stair runner with slip-resistant underlay and proper grippers to boost grip, protect treads, and refresh style fast.
- Improve safety and ambience with LED stair lighting under nosings or along stringers, ideally with diffusers and motion sensors.
Choose Staircase Upgrades by Cost, Time, and Skill
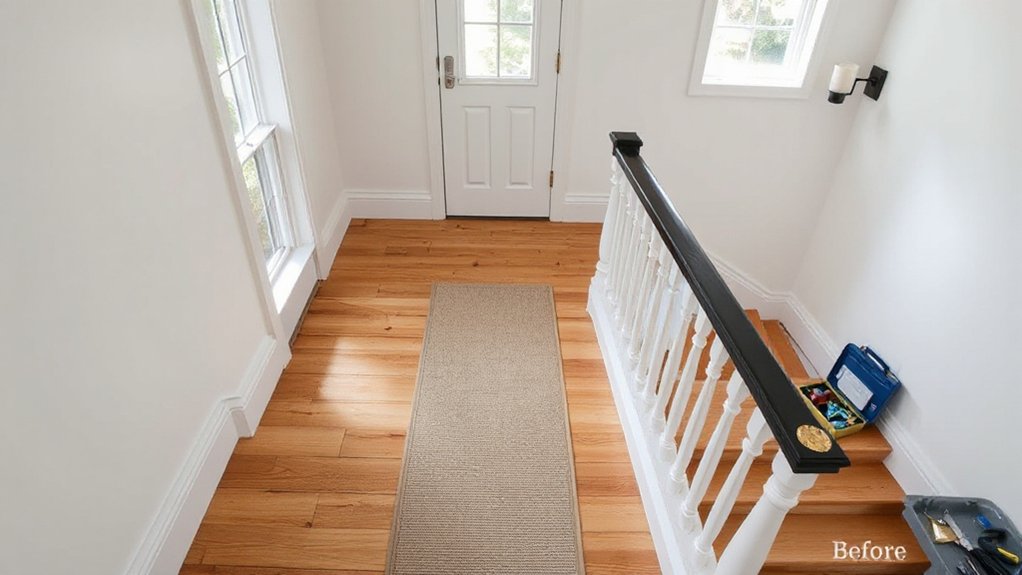
Before you buy anything, sort potential staircase upgrades by budget, downtime, and the tools you can confidently use, because these three constraints dictate what’s realistic without a full renovation. If you’ve got a small budget and one afternoon, a Carpet covering on treads reduces noise, improves grip, and hides wear; you’ll only need a knife, straightedge, adhesive, and a knee kicker for tight fits. With a weekend and moderate DIY skills, swap balusters or add a new handrail, checking UK Building Regulations Part K for height and spacing. If you can’t drill accurately or work with toughened panels, don’t DIY a Glass railing; use an installer for fixings, load paths, and compliance. Plan access routes, dust control, and safe temporary handrails.
Paint or Stain Stairs for a Fast Makeover
If you want the biggest visual change with the least disruption, paint or stain your stairs because you can refresh timber in place without altering the structure. Start by checking for squeaks, loose nosings, and worn varnish; fix, then degrease with sugar soap. Sand to a consistent key (80–120 grit) and vacuum thoroughly. For paint, choose a hardwearing floor enamel or polyurethane system; prime knots and bare patches first. For stain, use a spirit-based product for fast drying, then seal with two coats of durable varnish. Set your Color palette around hall light levels and existing flooring. Use finishing techniques like cutting in edges, maintaining a wet edge, and adding non-slip aggregate to the topcoat for UK safety.
Swap Balusters to Modernize Your Staircase
To modernise your staircase without major building work, you can swap the balusters for a cleaner, more contemporary look. Start by choosing a baluster style that suits your handrail and the spacing requirements under UK Building Regulations, then remove the old spindles by cutting fixings and easing them out without damaging the base rail. Finally, dry-fit and install the new balusters with accurate measuring, adhesive and pins/screws as specified, and keep everything plumb for a safe, consistent finish.
Choosing A Baluster Style
Although your handrail and newel posts do most of the structural work, balusters set the visual tone, so choosing the right style is the fastest way to modernise a UK staircase without touching the string or tread layout. Start by matching profile to your home: square spindles suit contemporary terraces; turned spindles fit period semis; slim steel rods or glass panels read minimalist. Decide Baluster material based on wear and code: painted softwood is budget-friendly, hardwood resists dents, and powder-coated steel handles high-traffic halls. Keep spacing compliant with UK guidance—aim so a 100 mm sphere can’t pass through. Use decorative patterns sparingly: alternate plain and feature balusters at landings, or align motifs with your newel caps for a clean sightline.
Removing Old Balusters
Before you fit modern spindles, remove the old balusters without damaging the handrail, baserail, or treads. Start by isolating the area and setting safety considerations: wear goggles, gloves, and a P3 mask if you suspect old lead paint. Check Baluster materials first—timber often pins or glue-blocks into the baserail, while metal may be screwed through brackets.
Score around joints with a sharp knife to break paint. If you’ve got glue blocks, tap them off with a bolster chisel, working with the grain. For nailed timber, cut the baluster mid-span with a multi-tool, then twist each end free using grips. Back out screws rather than levering, and bag all debris immediately. Vacuum dust from housings and inspect for splits.
Installing New Balusters
With the old balusters out and the housings cleaned up, you can fit new spindles to sharpen the look of the whole flight. Choose your Baluster material first: primed softwood suits paint-grade stairs, oak matches natural treads, and powder-coated steel gives a crisp, modern line. Dry-fit each baluster into the base rail and handrail, then mark and cut to length with a mitre saw for square, repeatable ends. Apply PU adhesive in the mortices, tap home, and pin through the rails with 50mm lost-head nails or trim screws. Keep Baluster spacing compliant: aim for gaps under 100mm to meet UK guidance. Use a spacer block and a level so every spindle runs plumb and consistent. Fill, sand, and caulk before painting.
Update the Handrail for Comfort and Safety

If your staircase feels awkward to use, the handrail is usually the quickest fix for both comfort and compliance. Check the height first: in UK homes you’ll typically aim around 900–1000mm above pitch line, with consistent clearance from the wall.
Choose handrail materials that suit wear and grip: hardwood gives warmth, powder-coated steel is robust, and aluminium stays stable in fluctuating temperatures. Prioritise ergonomic design by selecting an oval or round profile that fits your hand, with smooth progression at returns to reduce snag risks. Fix it into solid structure, not just plaster: use appropriate brackets, hit studs or masonry, and space fixings to prevent flex. Finally, seal or lacquer timber, and de-burr metal edges for safe daily use.
Add a Stair Runner for Grip and Style
Although a stair runner can look like a purely decorative upgrade, it also adds measurable grip underfoot and protects high-wear tread edges without touching the structure. Choose a runner with a dense pile or flatweave and a slip-resistant underlay rated for stairs; in the UK, look for low-VOC adhesives and fire performance suitable for escape routes where relevant.
Measure tread width and leave a 50–75 mm timber margin each side for a crisp finish. Use gripper rods on each tread and riser junction, then stretch the runner tight to avoid rippling and trip points. Textile patterns help disguise dirt and scuffs, while Color contrasts define the stair line and reduce missteps. Finish with metal stair rods if you want extra hold and heritage style.
Improve Staircase Lighting for Safer Steps
A stair runner sharpens footing, but you’ll cut missteps further when you can clearly see each tread edge in low light. Start by checking lux levels on the stairs; aim for even illumination with no glare on varnished timber. Fit LED strip lighting under the nosings or along the stringer, using diffusers to avoid harsh hotspots. If you don’t want chasing cables, choose low-voltage kits with adhesive channels and a plug-in driver. Add Smart lighting so you can set dusk-to-dawn schedules and reduce energy use. For safer night trips, install motion sensors at top and bottom landings, with a 30–60 second timeout. Keep switches at Part M-friendly heights and test from both directions.
Frequently Asked Questions
Will Upgrading My Staircase Increase My Home’s Resale Value?
Yes, upgrading your staircase can increase your home’s resale value, especially in the UK. You’ll boost buyer appeal with Decorative balustrades and lighting enhancements, improving safety, finish quality, and perceived maintenance across key viewing areas.
Do I Need a Building Permit for Minor Staircase Upgrades?
Probably not for minor cosmetic work, but you must meet building codes and safety regulations. For example, if you replace a handrail in Manchester, you’ll typically avoid permits, unless you alter structure, width, or fire-escape routes.
How Do I Fix Squeaky Stairs Without Removing Treads?
You can fix squeaky stairs by driving trim screws through treads into joists, adding adhesive via gaps, and installing wedges from below; check Squeaky hinges on balustrades. For Tread reinforcement, fit brackets underneath, then retighten.
What Are the Best Options for Childproofing a Staircase?
You’ll childproof a staircase best by fitting a top-and-bottom safety gate, checking Baluster spacing stays under 100mm, adding Non slip treads, and installing a secure handrail. You’ll also keep lighting bright and edges visible.
How Can I Reduce Stair Noise Between Floors?
You can reduce stair noise by tightening fixings, adding acoustic underlay and carpet, and sealing gaps with acoustic mastic. Fit rubber tread pads or stair nosing for impact damping—practical soundproofing solutions and noise reduction techniques.
Conclusion
Funny how you start by fixing one squeaky tread and, coincidentally, end up with a staircase that looks newly fitted. You’ve seen how paint or stain delivers a quick refresh, new balusters sharpen the profile, and a better handrail improves comfort and compliance. Add a runner for grip, then upgrade lighting with PIR LEDs or low-level step lights for safer night use. You’ll boost safety, style, and value—without booking a full renovation.