
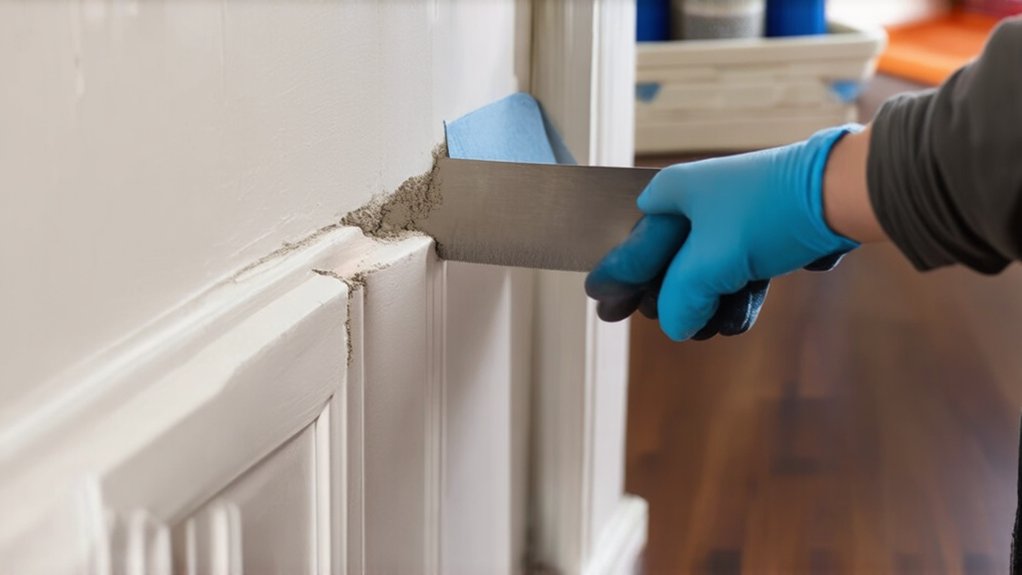

Most paint failures start long before you open the can, in wall prep you can’t see once the finish is on. If you rush assessment, skip degreasing, or use the wrong primer for your substrate, you’ll get peeling, flashing, and visible patches no matter how premium the paint is. When you understand how to inspect, clean, repair, sand, and prime correctly, your walls stop fighting you—and that’s where the real transformation begins.
Key Takeaways
- Thoroughly inspect walls under strong angled light, marking cracks, nail pops, stains, and rough areas for targeted repair.
- Clean and degrease walls with warm water and cleaner, then rinse and dry completely to ensure proper paint adhesion.
- Repair all damage—fill cracks and holes, fix nail pops, and resolve any moisture problems—allowing patches to cure fully.
- Sand or skim coat to smooth ridges and seams, then sand lightly again and dust off for an ultra-even surface.
- Apply the right primer for your surface and stains to improve adhesion, block bleed-through, and ensure accurate, uniform color.
Assess Your Walls Before You Start
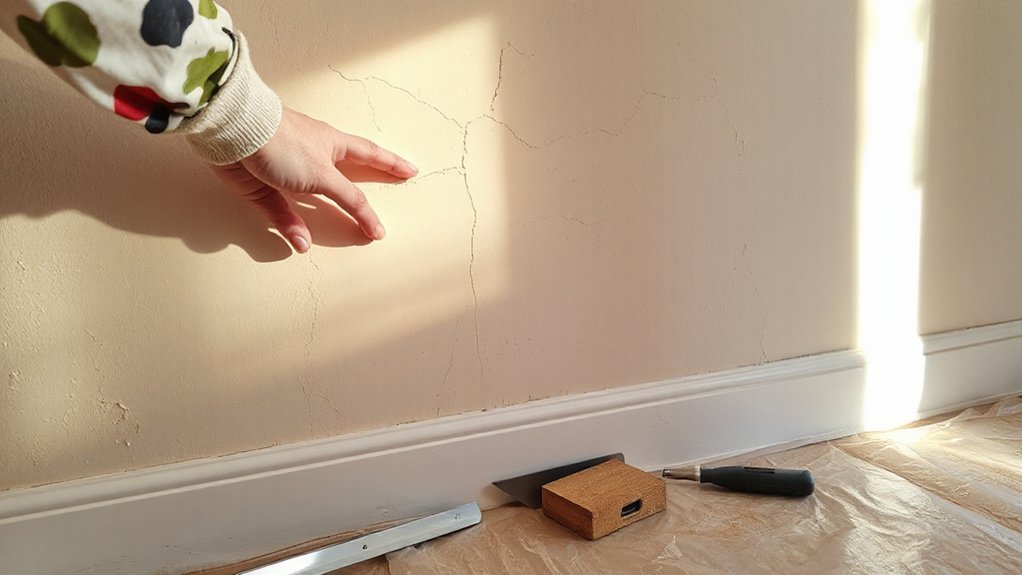
Before you pick up a scraper or roller, you need to systematically evaluate the current condition of your walls so you know exactly what you’re working with. Stand back and scan each surface under strong, angled light. Note cracks, nail pops, peeling areas, glossy zones, and stains; mark them with painter’s tape for targeted repair.
Run your hand across the wall texture to identify rough patches, ridges, or uneven joint compound that’ll telegraph through new paint.
Confirm paint color compatibility by checking existing sheen and hue: drastic color changes or dark-to-light transitions may require a specific primer to prevent bleed-through and flashing.
Finally, check for moisture issues near windows, ceilings, and baseboards—any active dampness must be resolved before you proceed.
Clean and Degrease for Better Paint Adhesion
Even if your walls look relatively clean, you need to remove embedded dust, grease, and residues so primer and paint can bond to the surface instead of to contaminants. Start by vacuuming or wiping with a dry microfiber cloth to clear loose particles that interfere with adhesion and reveal true wall texture.
Next, wash with a solution of warm water and a degreasing cleaner, working from the bottom up to prevent streaks. Rinse with clean water and let the surface dry completely.
In kitchens, bathrooms, and around light switches, use a stronger degreaser to cut cooking oils and skin oils that cause paint failure.
Thorough cleaning guarantees the final paint color appears accurate, uniform, and durable, rather than blotchy or prematurely peeling.
Repair Cracks, Holes, and Other Wall Damage
Once the surface is clean and dry, you need to restore a sound, uniform substrate by repairing every crack, hole, and defect that could telegraph through the finish coat. Start by inspecting under strong, raking light, especially areas affected by wallpaper removal, impact, or previous repairs.
Perform moisture testing on any stained, soft, or suspicious areas; don’t patch until the source of moisture is corrected and the substrate is within acceptable readings.
Cut V-grooves into cracks with a utility knife, then fill with a suitable patching compound or setting-type joint compound.
For larger holes, install a backing piece or repair patch before filling.
Rake out loose material from nail pops, secure the fastener, and patch.
Allow repairs to cure fully before proceeding.
Smooth Surfaces by Sanding and Skim Coating
To get perfectly paint-ready walls, you’ll start by selecting the correct sandpaper grit for leveling patched areas and feathering edges.
Next, you’ll apply a controlled skim coat, using consistent pressure and trowel angles to fill minor imperfections and create a uniform surface.
Finally, you’ll refine the wall with progressive sanding and targeted touch-ups so it feels ultra-smooth to the hand and looks flawless under raking light.
Choosing Proper Sandpaper Grit
Although it seems simple, selecting the correct sandpaper grit is one of the most technical parts of creating a smooth, paint-ready wall surface. You’ll start by understanding Sandpaper types: use aluminum oxide for drywall, garnet for softer hand-sanding, and silicon carbide for aggressive cutting or between-coat scuffing.
Base your grit selection on surface condition. For heavy ridges or thick joint buildup, start with 80–100 grit on a sanding pole, keeping pressure light to avoid gouging paper-faced drywall.
For typical joint compound feathering, move to 120–150 grit to refine edges without scratching.
Finish with 180–220 grit to remove swirl marks and create a uniform profile that accepts primer cleanly.
Always sand in broad, overlapping strokes and inspect under raking light.
Skim Coat Application Steps
Proper sanding sets the stage, but a skim coat creates the true near-flawless surface high-end paint jobs demand. Start by mixing joint compound to a yogurt-like consistency. Prime very porous surfaces first so the compound doesn’t flash-dry.
Using a 10–12 inch drywall knife or trowel, pull a thin, continuous layer across the wall, working from top to bottom, maintaining a consistent angle and pressure. Feather edges with each pass to avoid ridges. Let the coat dry fully, then lightly sand high spots and dust off.
Apply a second skim if you still see visible seams, patched areas, or inconsistent absorption that could telegraph through texture techniques or precise paint color coordination. Finally, spot-check under strong raking light and correct any remaining defects.
Achieving Ultra-Smooth Walls
Ever wonder why some painted walls look like glass while others reveal every joint and patch? You achieve ultra-smooth walls by combining disciplined sanding with controlled skim coating.
After repairs, scrape residue from wallpaper removal and degloss heavy textured finishes. Use a bright raking light to identify ridges, bubbles, and lap lines.
Start with 120–150 grit paper on a sanding pole or dustless sander, leveling joints and feathering edges. Vacuum and tack-cloth the surface before applying a tight skim coat with a 10–14″ drywall knife. Pull mud in long, continuous passes, maintaining consistent pressure.
Once dry, sand again with 180–220 grit to remove chatter marks and edges. Prime, recheck under raking light, then spot-skim and sand as needed.
Prime Different Wall Types the Right Way
Why does primer behave so differently from one wall to another? Because each substrate absorbs, bonds, and stains in its own way—and you must match primer chemistry to that behavior.
On new drywall, use a high-solids PVA primer to seal paper and joint compound evenly, giving you predictable paint color choices and crisp decorative wall techniques.
On previously painted walls, choose an acrylic bonding primer; it improves adhesion and levels porosity between patched and existing areas.
For glossy enamel or laminate, scuff-sand, then apply a dedicated bonding primer to prevent peeling.
Masonry, concrete, and brick require alkaline-resistant masonry primer to block efflorescence.
For stained, smoke-damaged, or knotty surfaces, use a shellac- or oil-based stain-blocking primer to lock contaminants beneath the finish.
Avoid Common Wall Prep Mistakes DIYers Make

Although wall prep looks straightforward, a few recurring missteps can sabotage adhesion, durability, and finish quality long before you open a paint can. You rush cleaning, leaving grease, dust, or smoke residue that blocks proper bonding.
You spot-patch but don’t feather edges, so every repair telegraphs through the topcoat.
You also ignore surface texture. You sand too aggressively, creating low spots, or not enough, leaving glossy patches that resist primer. Failing to degloss previous high paint sheen is another common error; primer can’t compensate for slick, unscuffed surfaces.
You skip drying times between washing, patching, and priming, trapping moisture.
Finally, you use one grit of sandpaper for everything instead of stepping from coarse to fine, which yields a flatter, more uniform substrate.
Frequently Asked Questions
How Do Humidity and Temperature Affect Wall Preparation and Drying Times?
Humidity and temperature directly control surface curing; you adjust timing accordingly. High humidity impact slows evaporation, extends drying duration, risks blistering. Low temperatures thicken coatings, delay bonding. You monitor conditions, use dehumidifiers, heaters, and extended recoat intervals to maintain ideal performance.
What Safety Gear Should I Wear When Sanding or Using Chemical Cleaners?
Prioritize protective gear: wear a tight-fitting respirator, safety spectacles, sturdy gloves, and durable coveralls. For chemical safety, choose chemical-resistant gloves, splash-proof goggles, and adequate ventilation; avoid cotton masks, loose sleeves, and untested household cleaners.
How Can I Test Old Paint for Lead Before Starting Wall Prep?
You test old paint for lead by using EPA-recognized lead testing kits, following directions precisely. For paint safety, wet-scrape a small area, apply reagent, compare color change, and confirm positives with a certified lead inspector.
Which Tools Are Essential for a Beginner Doing Wall Preparation?
You’ll need a putty knife, sanding block (120–220 grit), utility knife, caulk gun, dust mask, vacuum, painter’s tape, and roller/brushes. Use a quality surface primer to seal repairs before applying your chosen paint color.
How Do I Estimate Time and Cost for Prepping Multiple Rooms?
You estimate time and cost by measuring wall area, assigning labor hours per square foot, and pricing materials per unit. Use Estimating costs spreadsheets, add 10–20% contingency, and apply strict Time management with room-by-room scheduling.
Conclusion
When you prep walls with care, you’re truly setting the stage for a flawless finish. You’ve assessed, cleaned, repaired, sanded, skim-coated, and primed—each step maximizes adhesion, durability, and visual uniformity. Remember, “an ounce of prevention is worth a pound of cure”: meticulous prep prevents peeling, flashing, and uneven sheen. Follow these practices every time, and you won’t just get better paint jobs—you’ll get professional-grade, long‑lasting results you can rely on.